How to Verify Google Search Console
Learn the key setup notes and practical use cases for How to Verify Google Search Console in the lihi knowledge base.

Verify Google Search Console
How to Verify Google Search Console – Method 1: HTML File Upload
- Enter URL: In Google Search Console (URL Prefix method), enter the domain you wish to verify (including
https://) and click Continue.
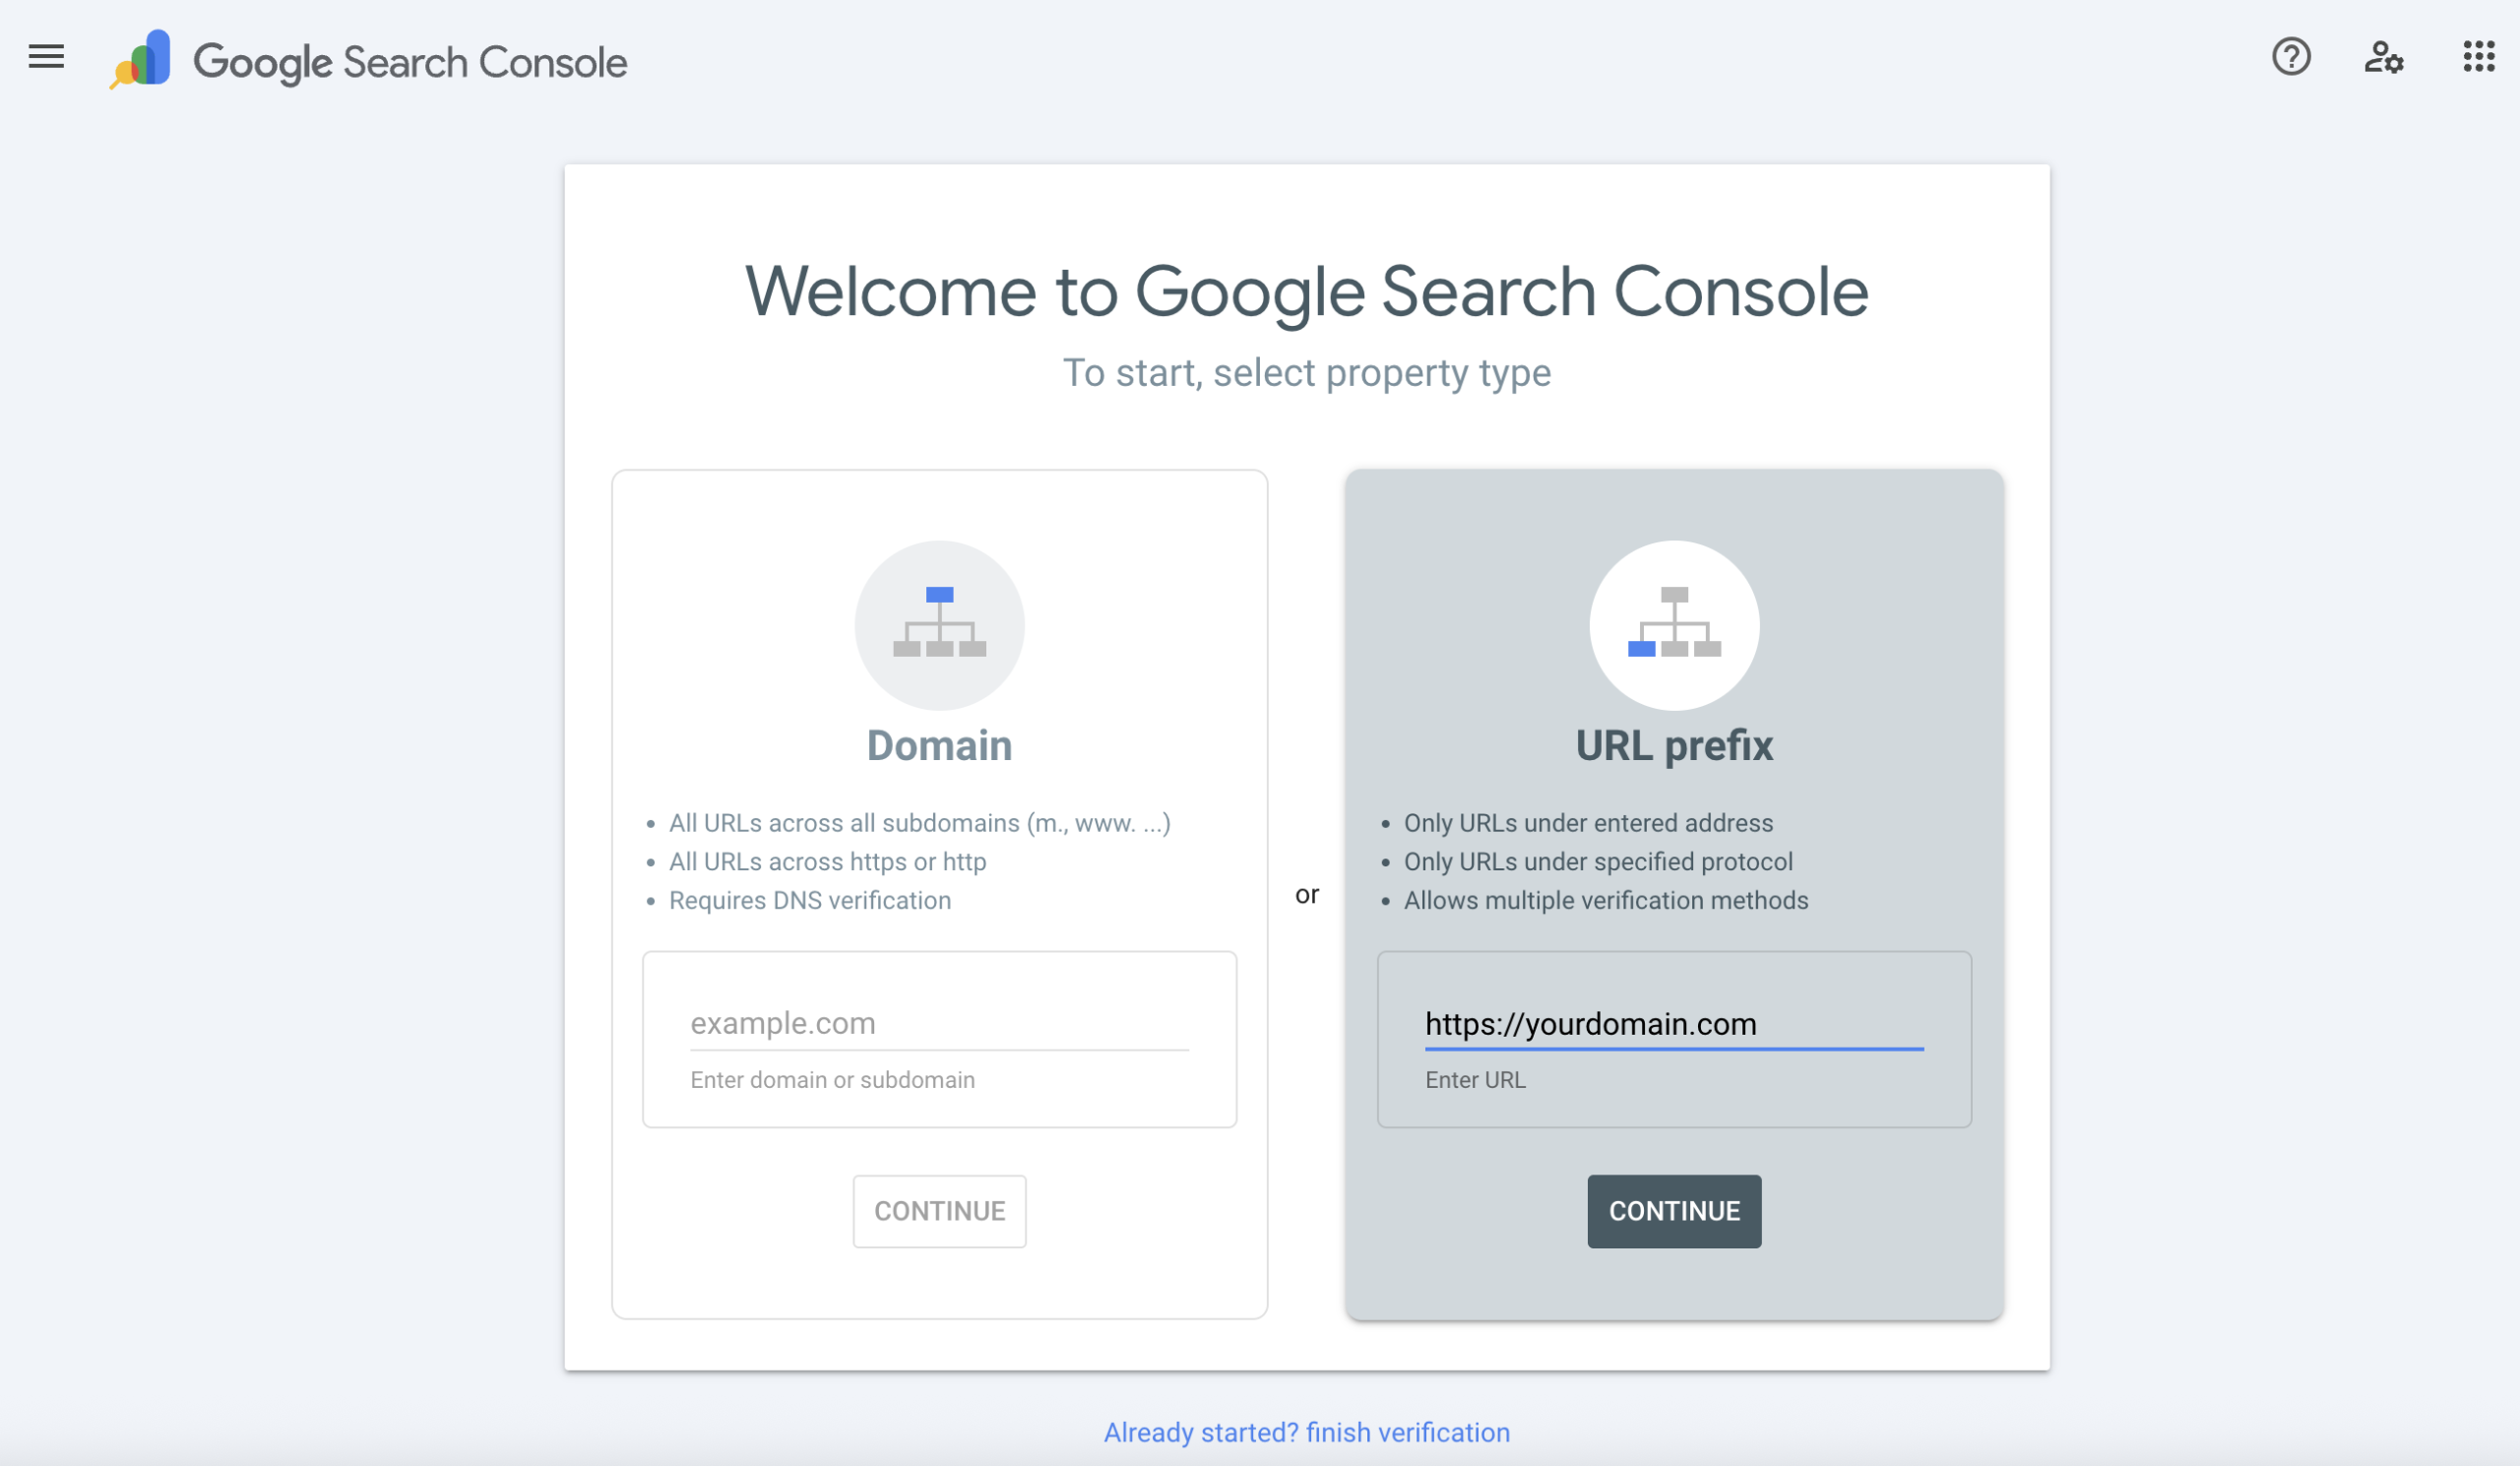
- Download File: Click to download the HTML verification file provided by Google.
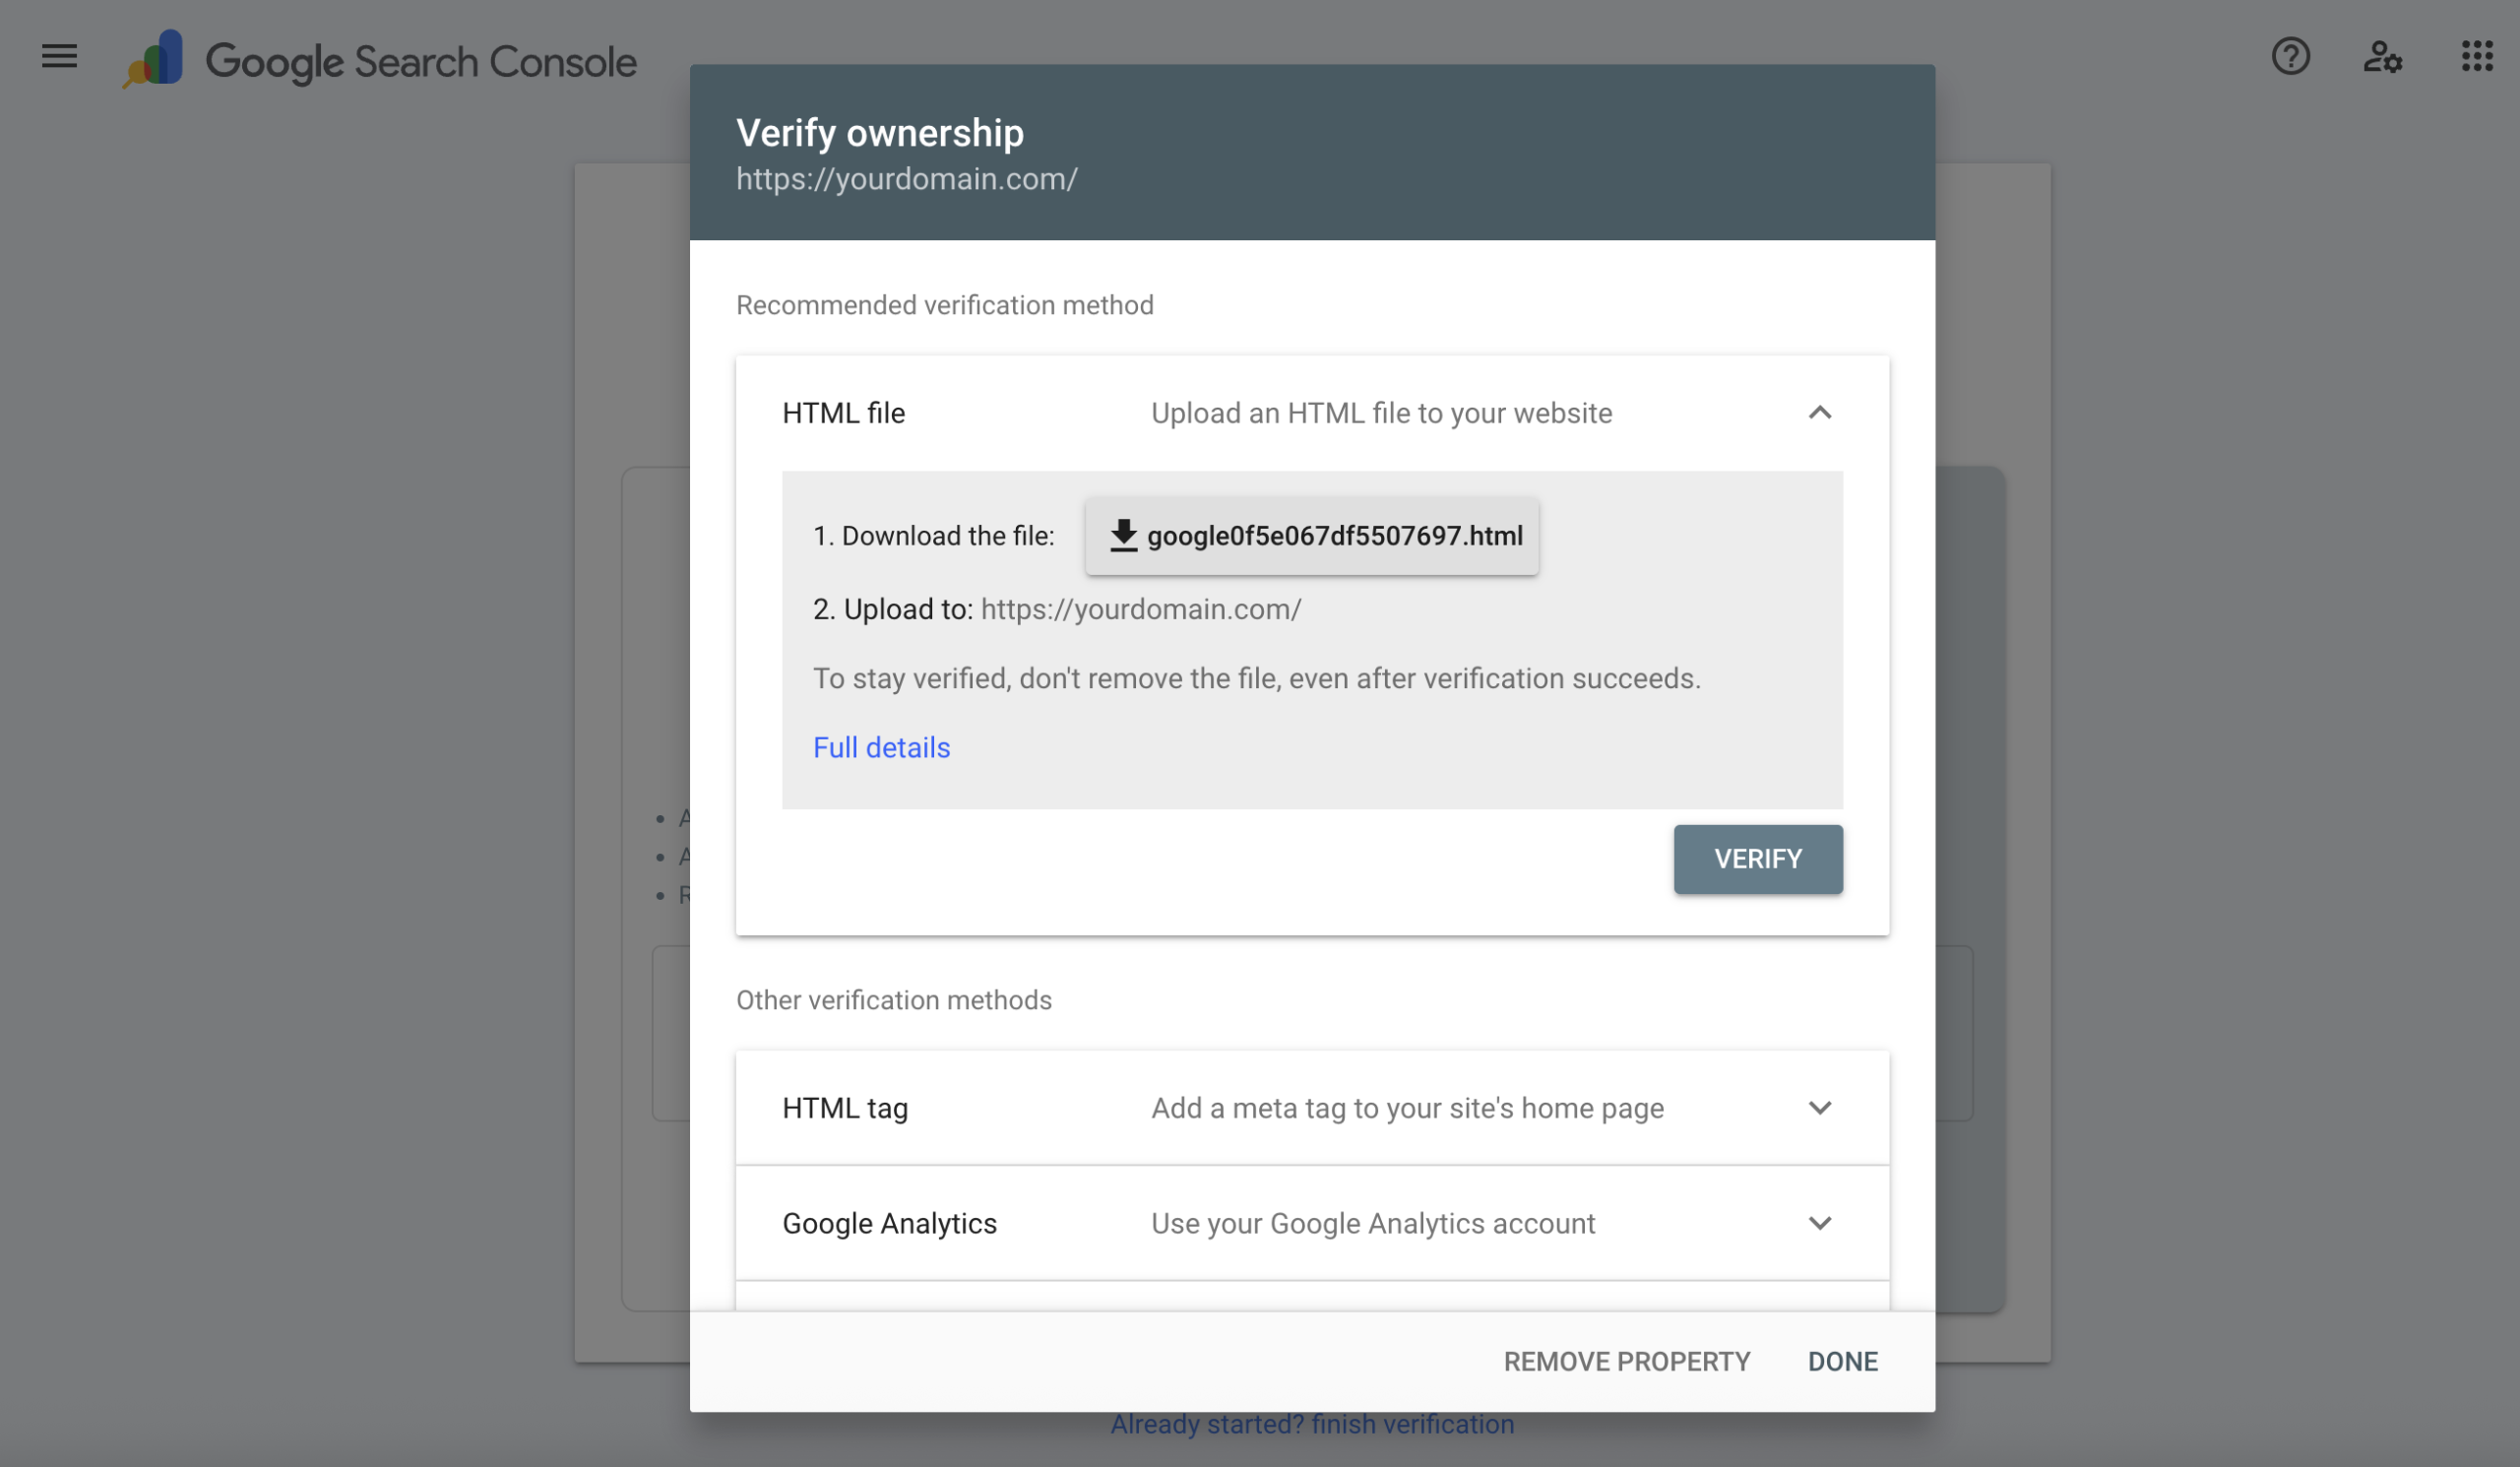
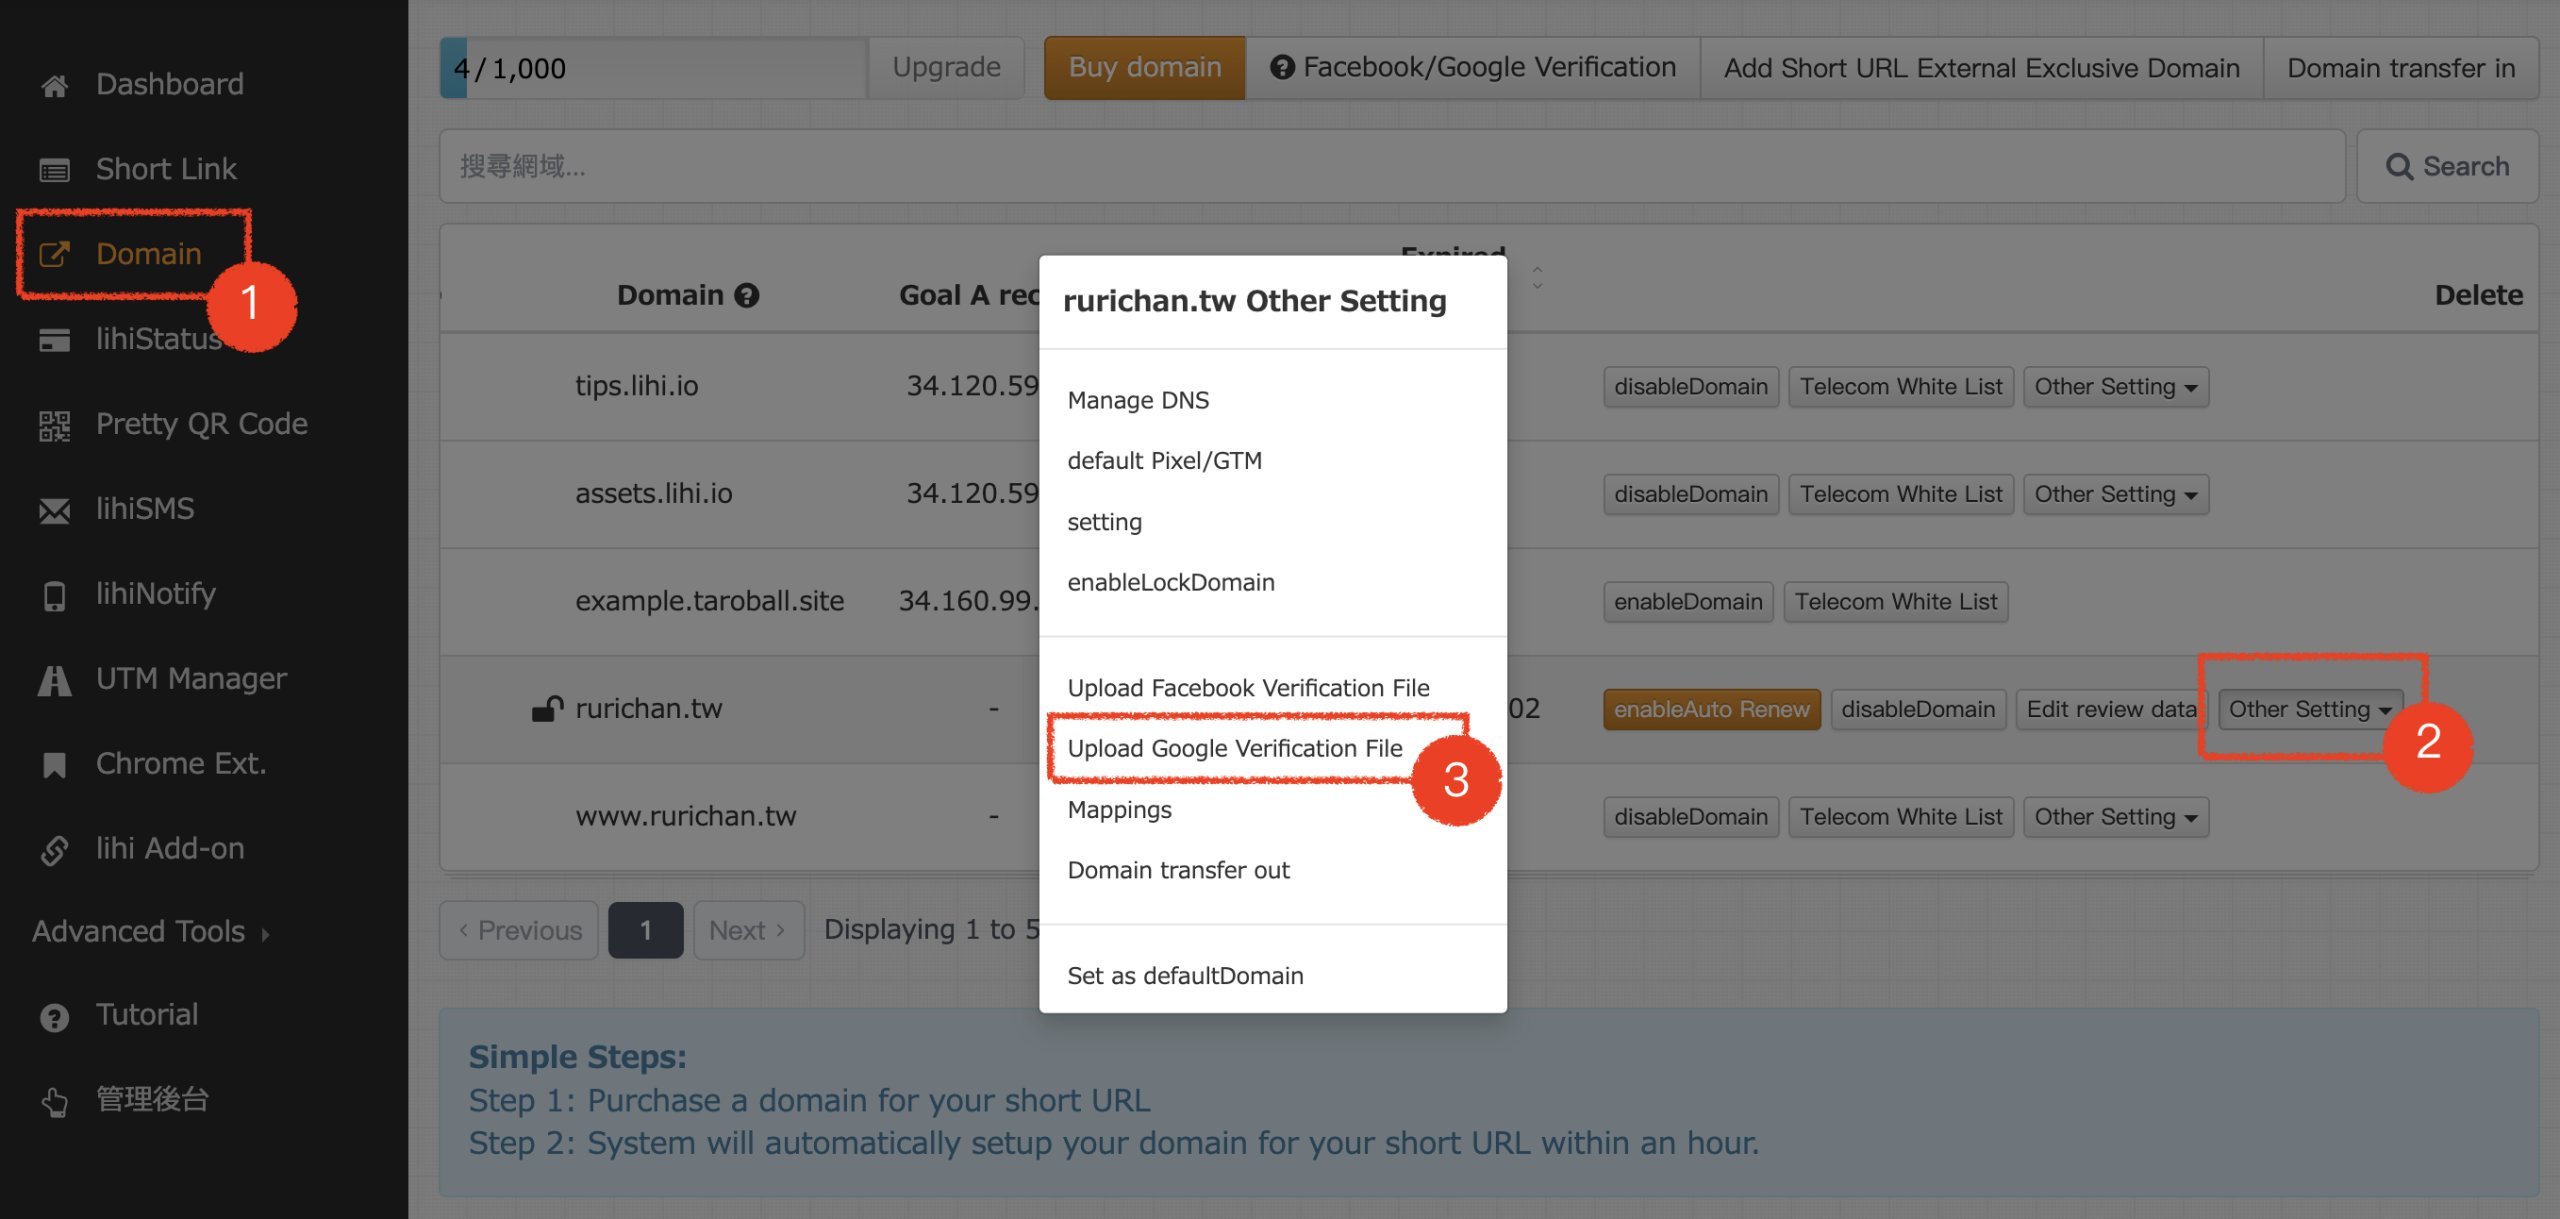
- Upload to lihi:
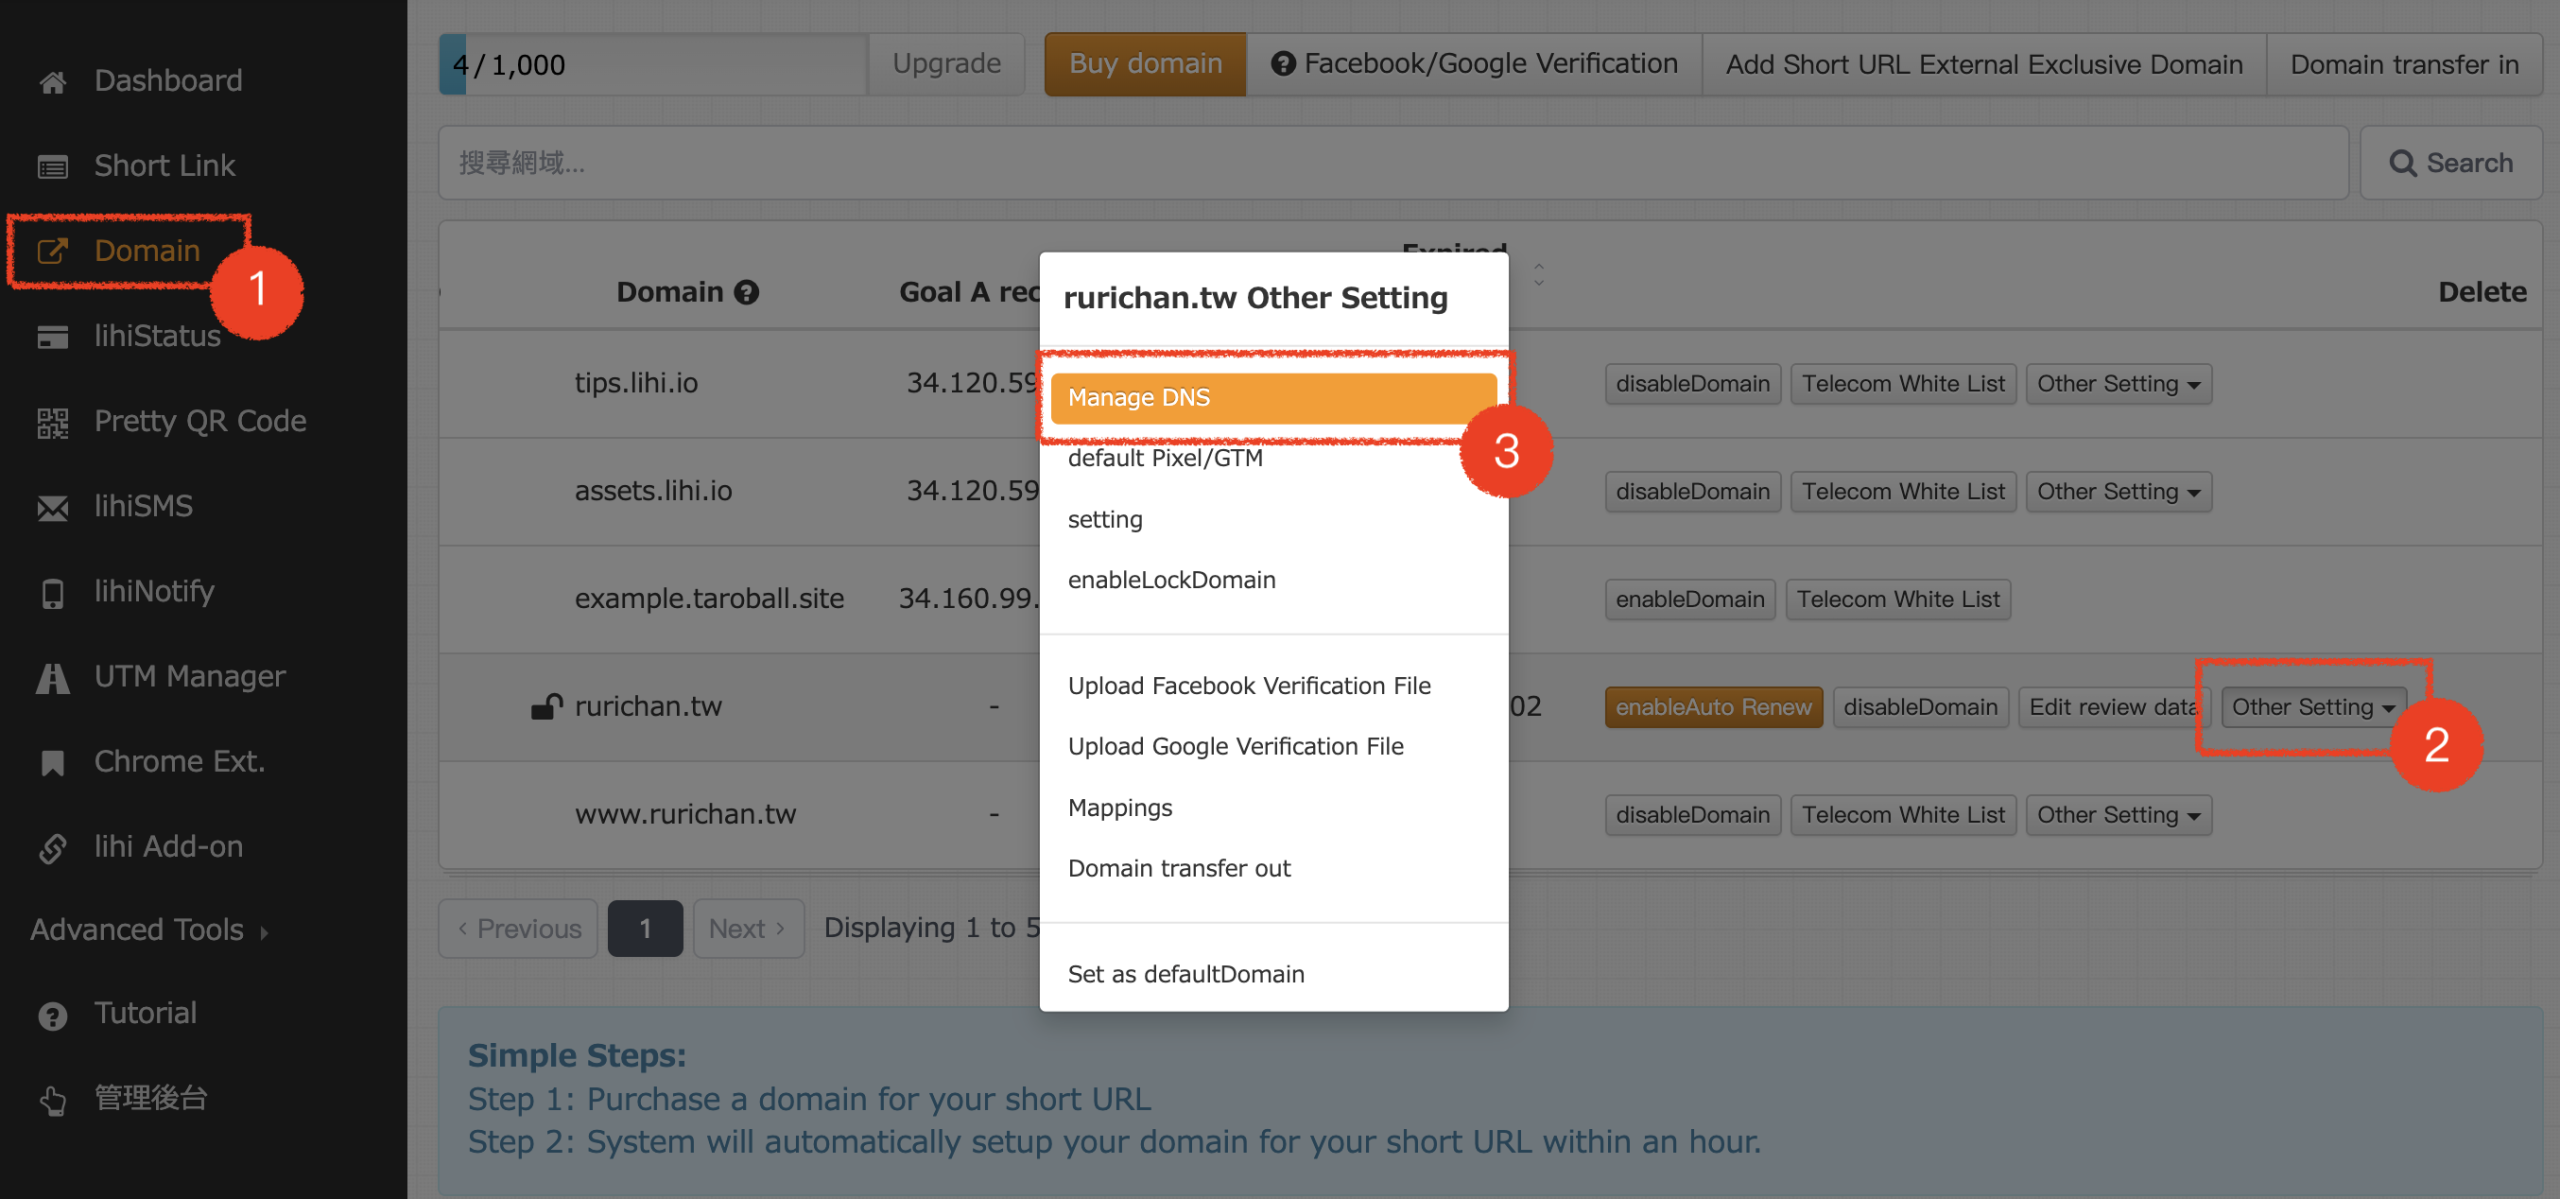
- Return to your lihi dashboard.
- Navigate to Domain and click Other Settings.
- Click “Upload Google Verification File” and upload the file you just downloaded from step 2.
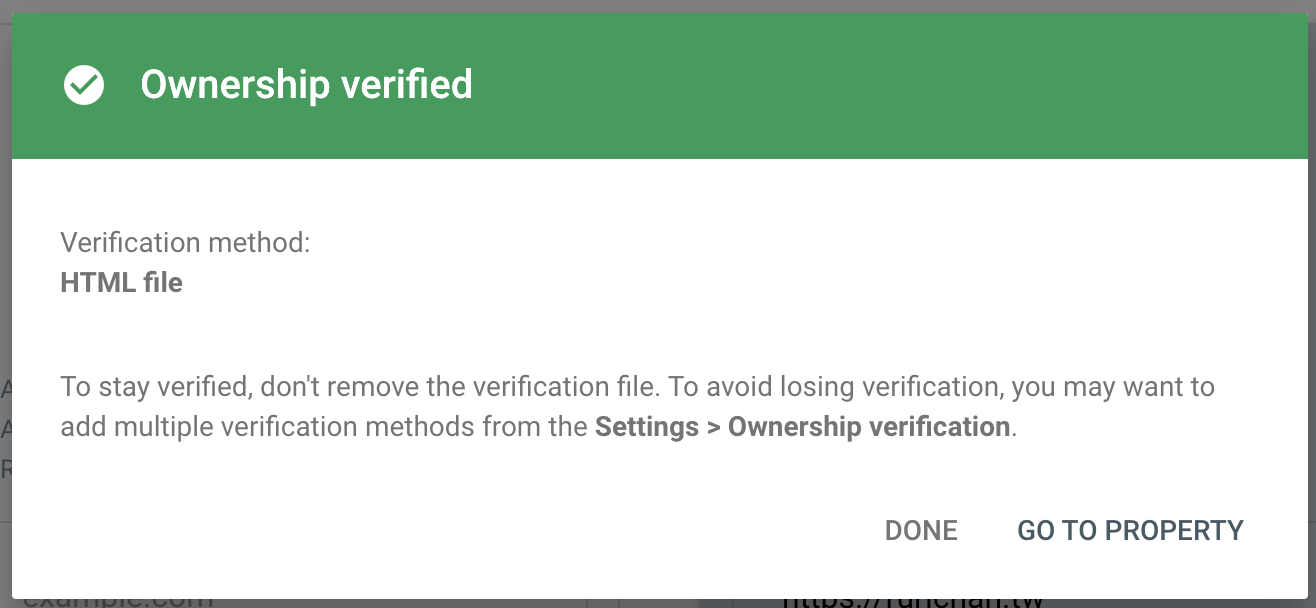
- Verify: Return to the Google Search Console screen and click Verify. Once the “Ownership verified” popup appears, the process is complete.
How to Verify Google Search Console – Method 2: TXT Record (DNS)
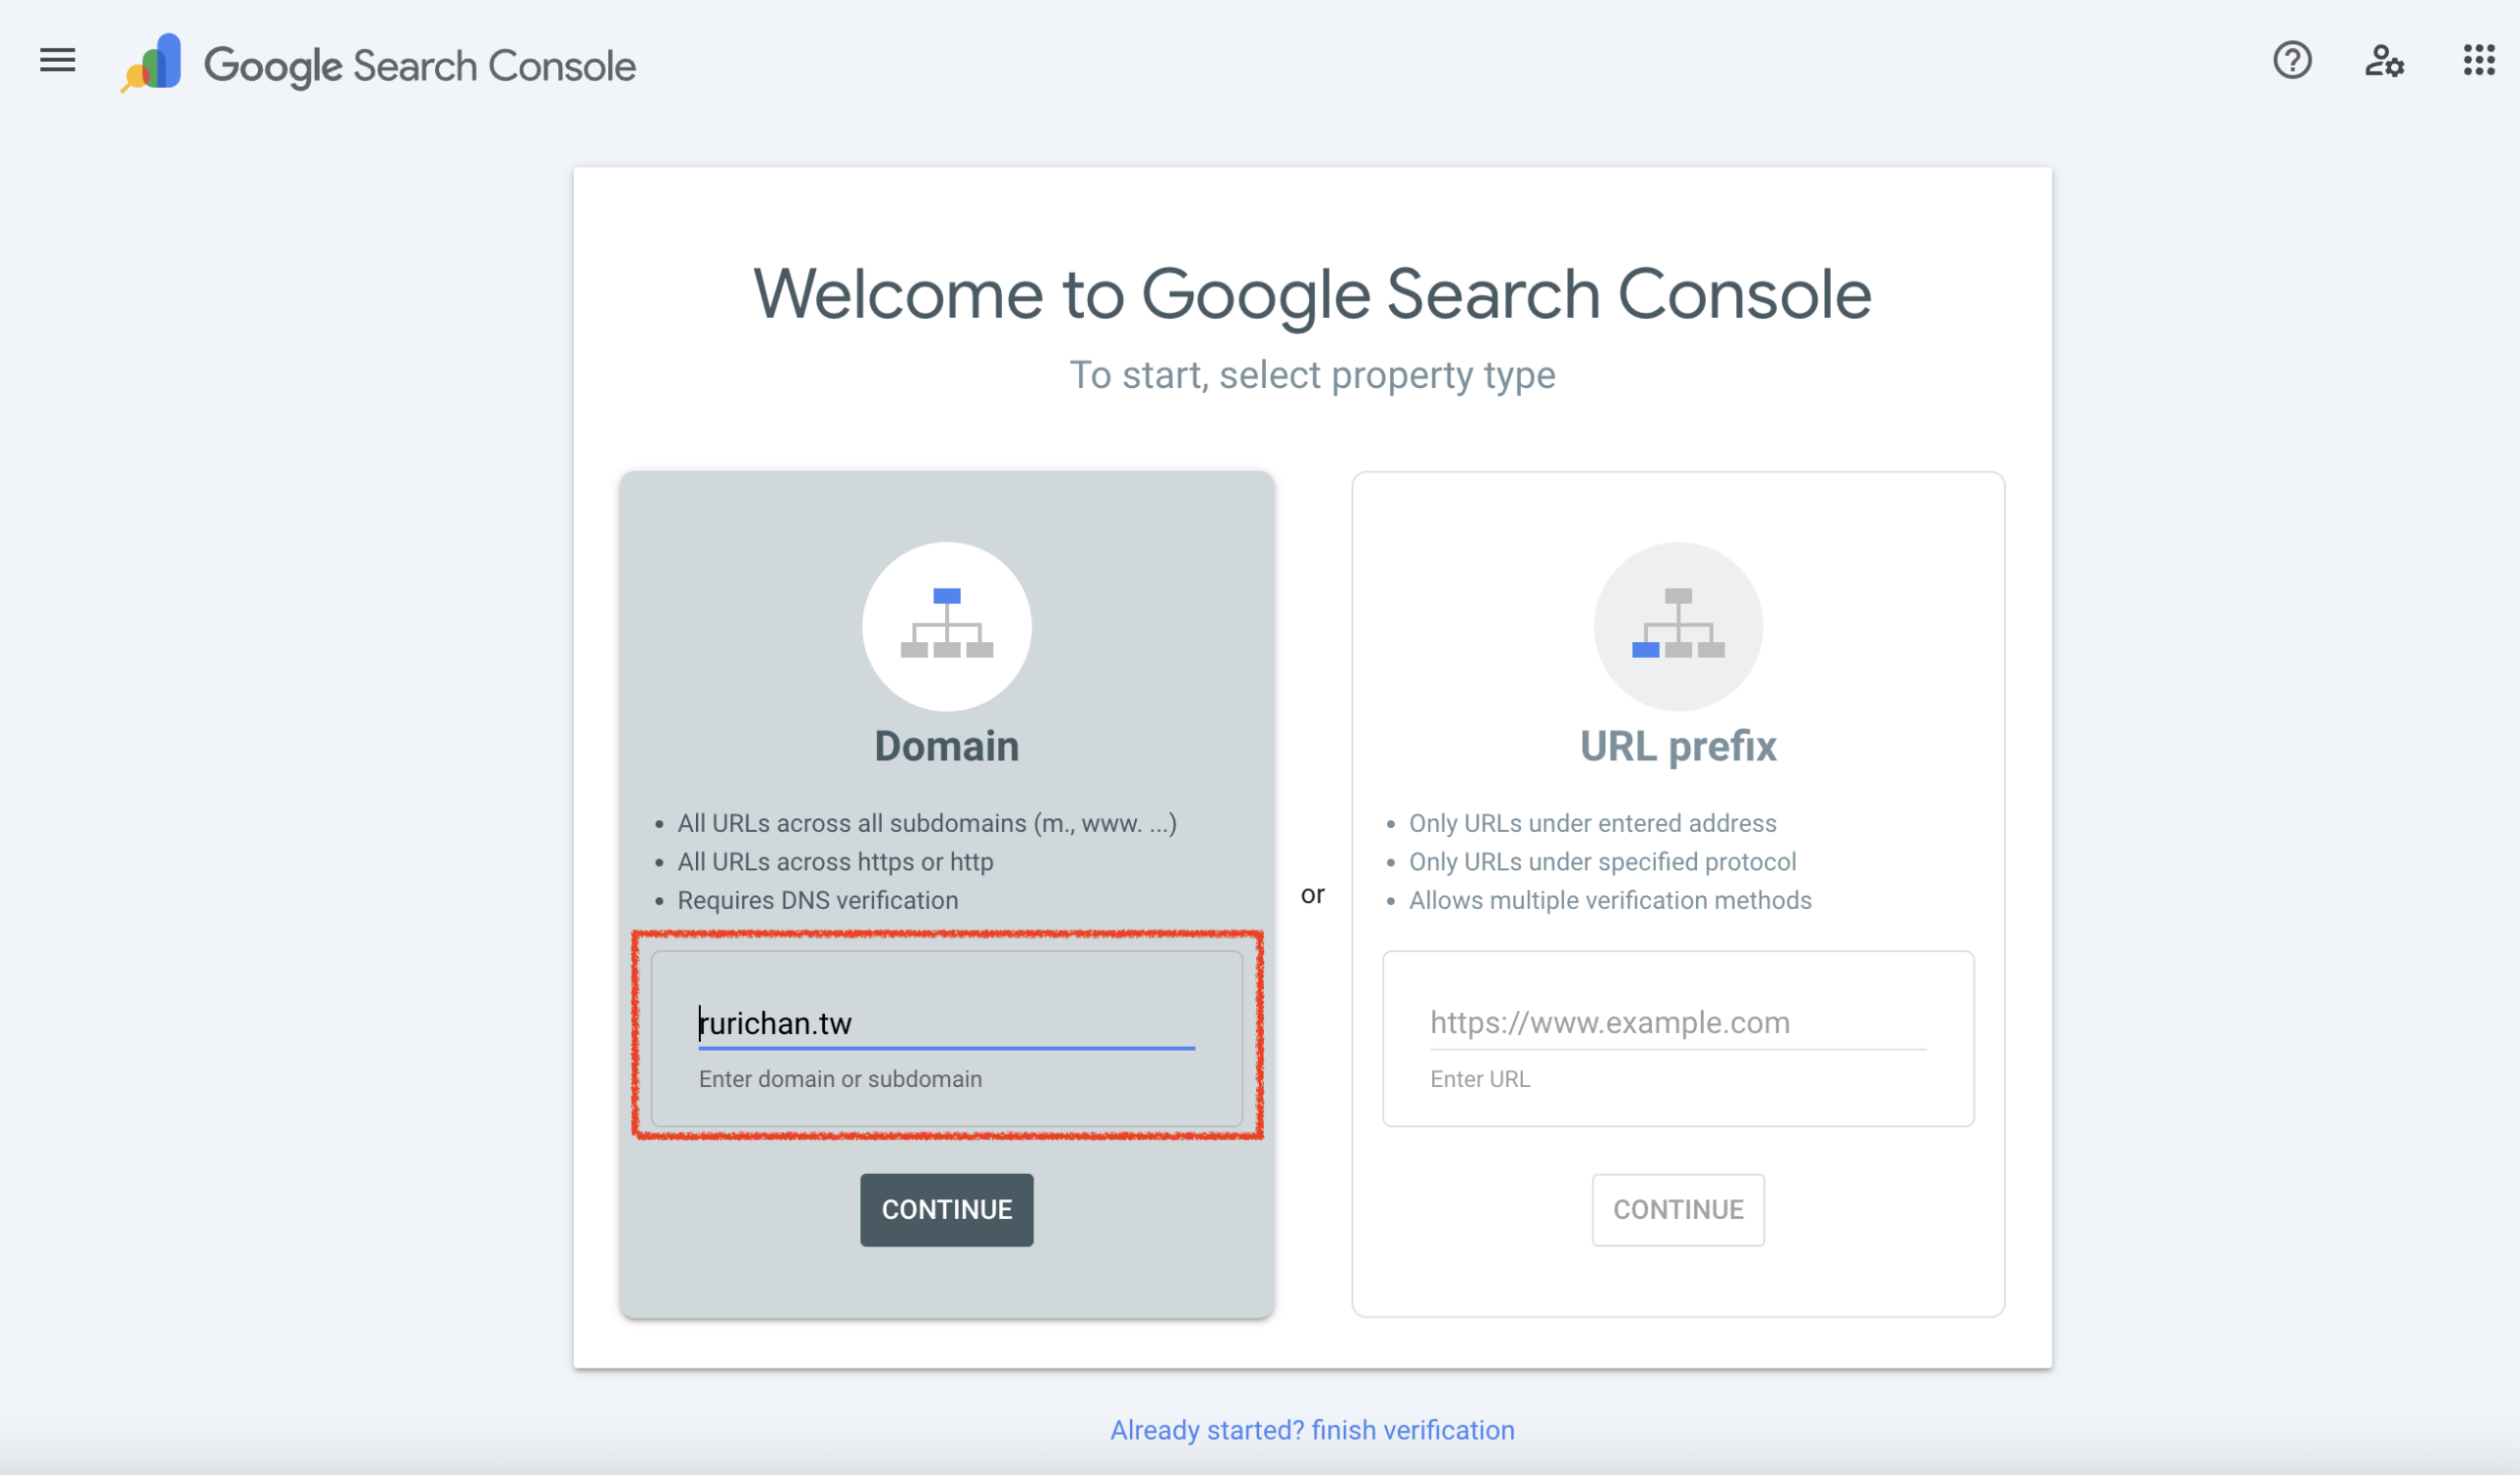
- Enter Domain: In Google Search Console (Domain property method), enter the domain name you wish to verify and click Continue.
- Get Verification Code:
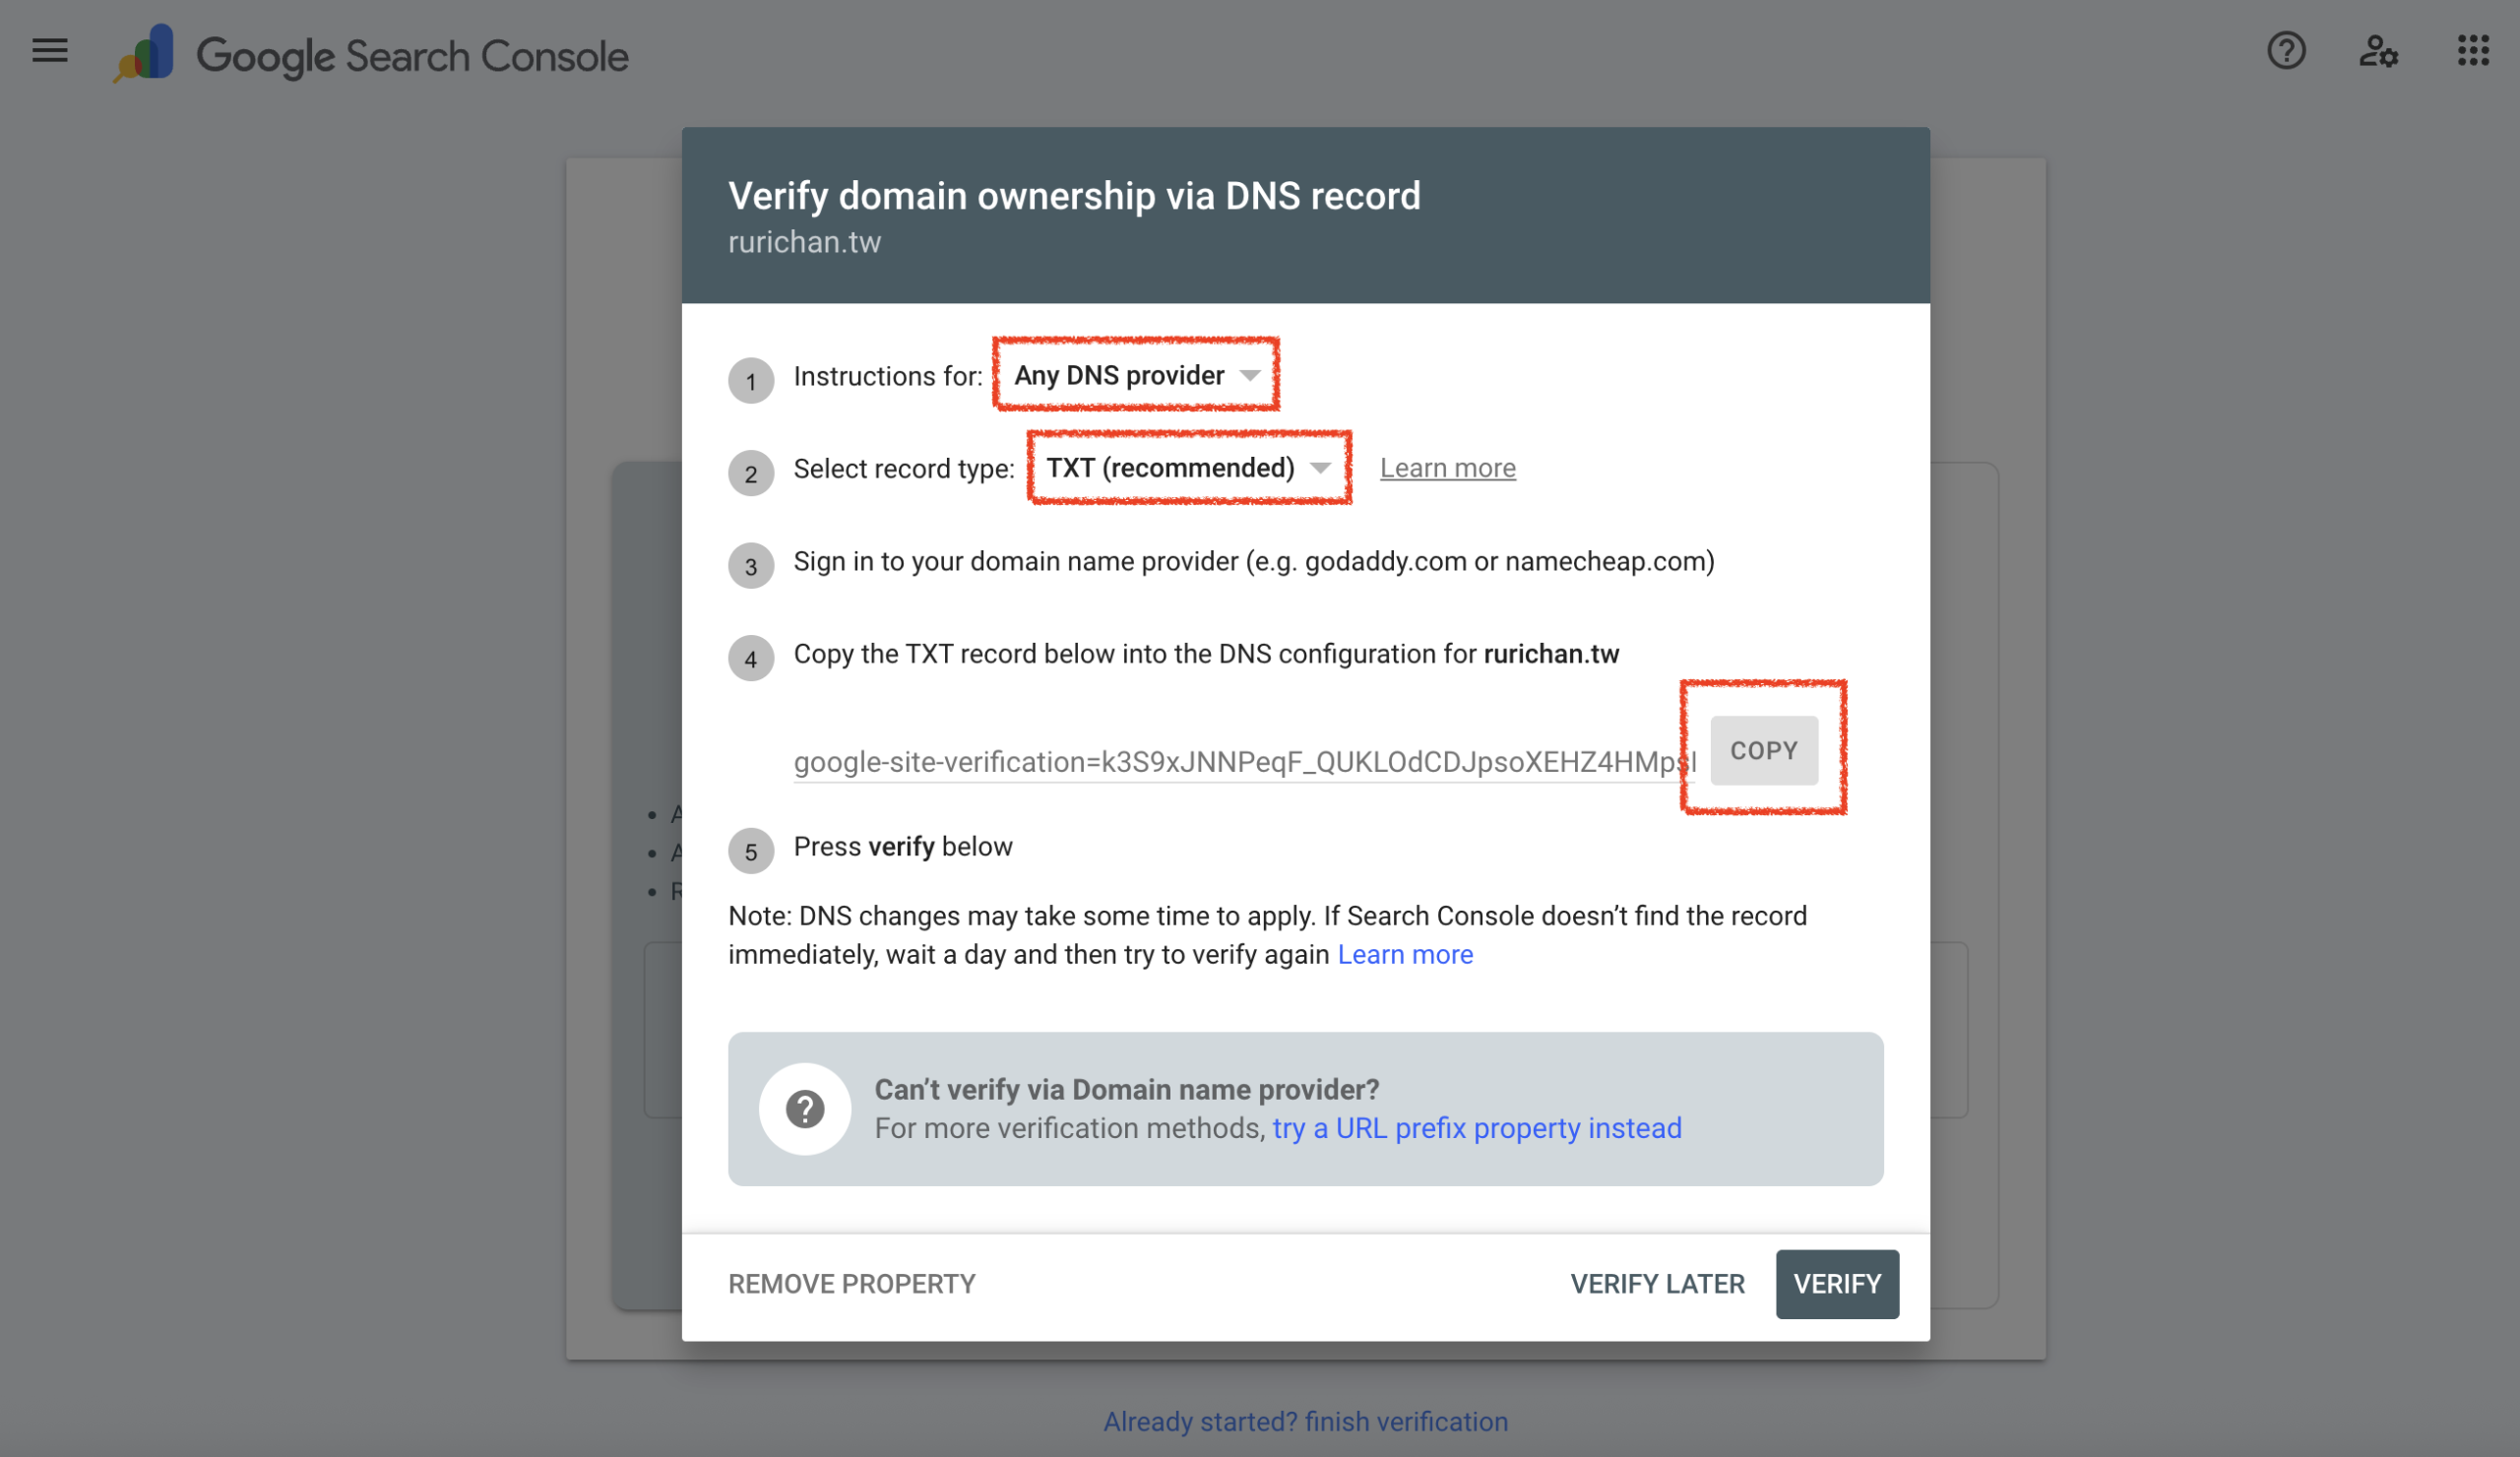
- In the dropdown menu, select “Any DNS provider.”
- Ensure the record type is set to TXT.
- Click Copy to copy the verification string.
- Access DNS Settings: Go to your domain registrar’s DNS management page. (Note: The following steps assume you are managing a domain purchased directly through the lihi dashboard.)
- Add Record:
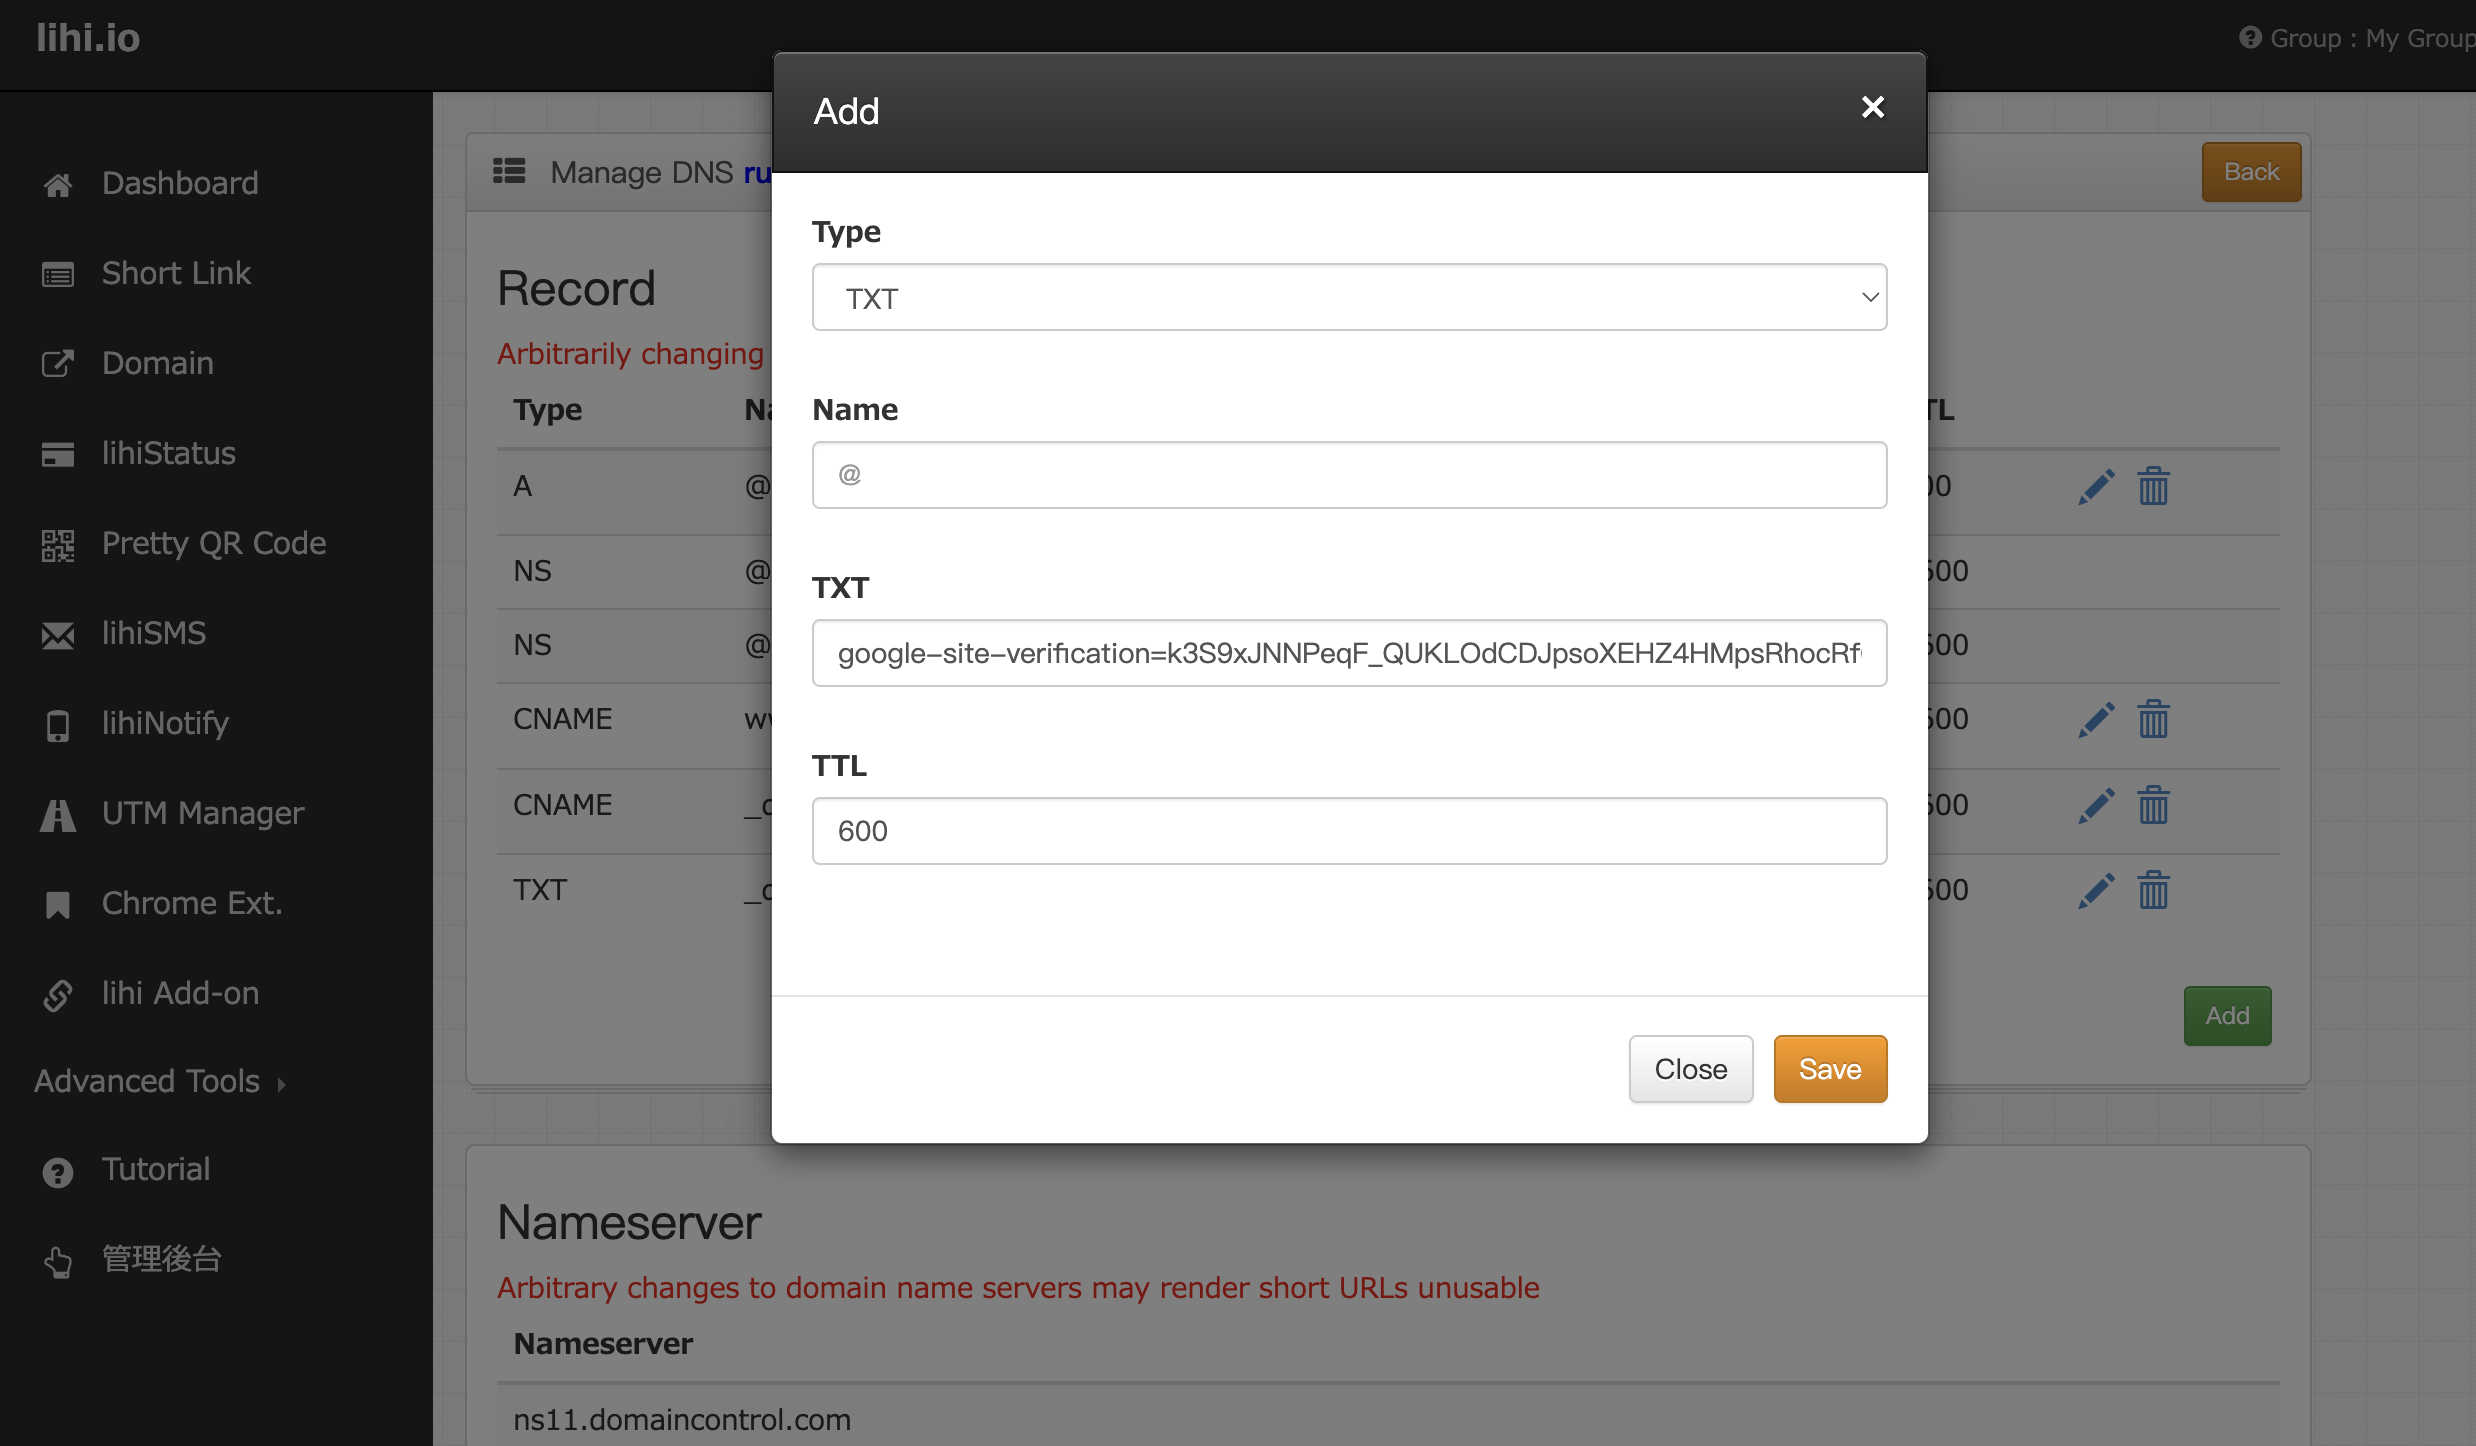
- Click Add.
- Fill in the required fields (Type: TXT; Value: Paste the code copied from Google).
- Click Save.
- Confirm & Verify:
- Ensure the new record appears in your list.
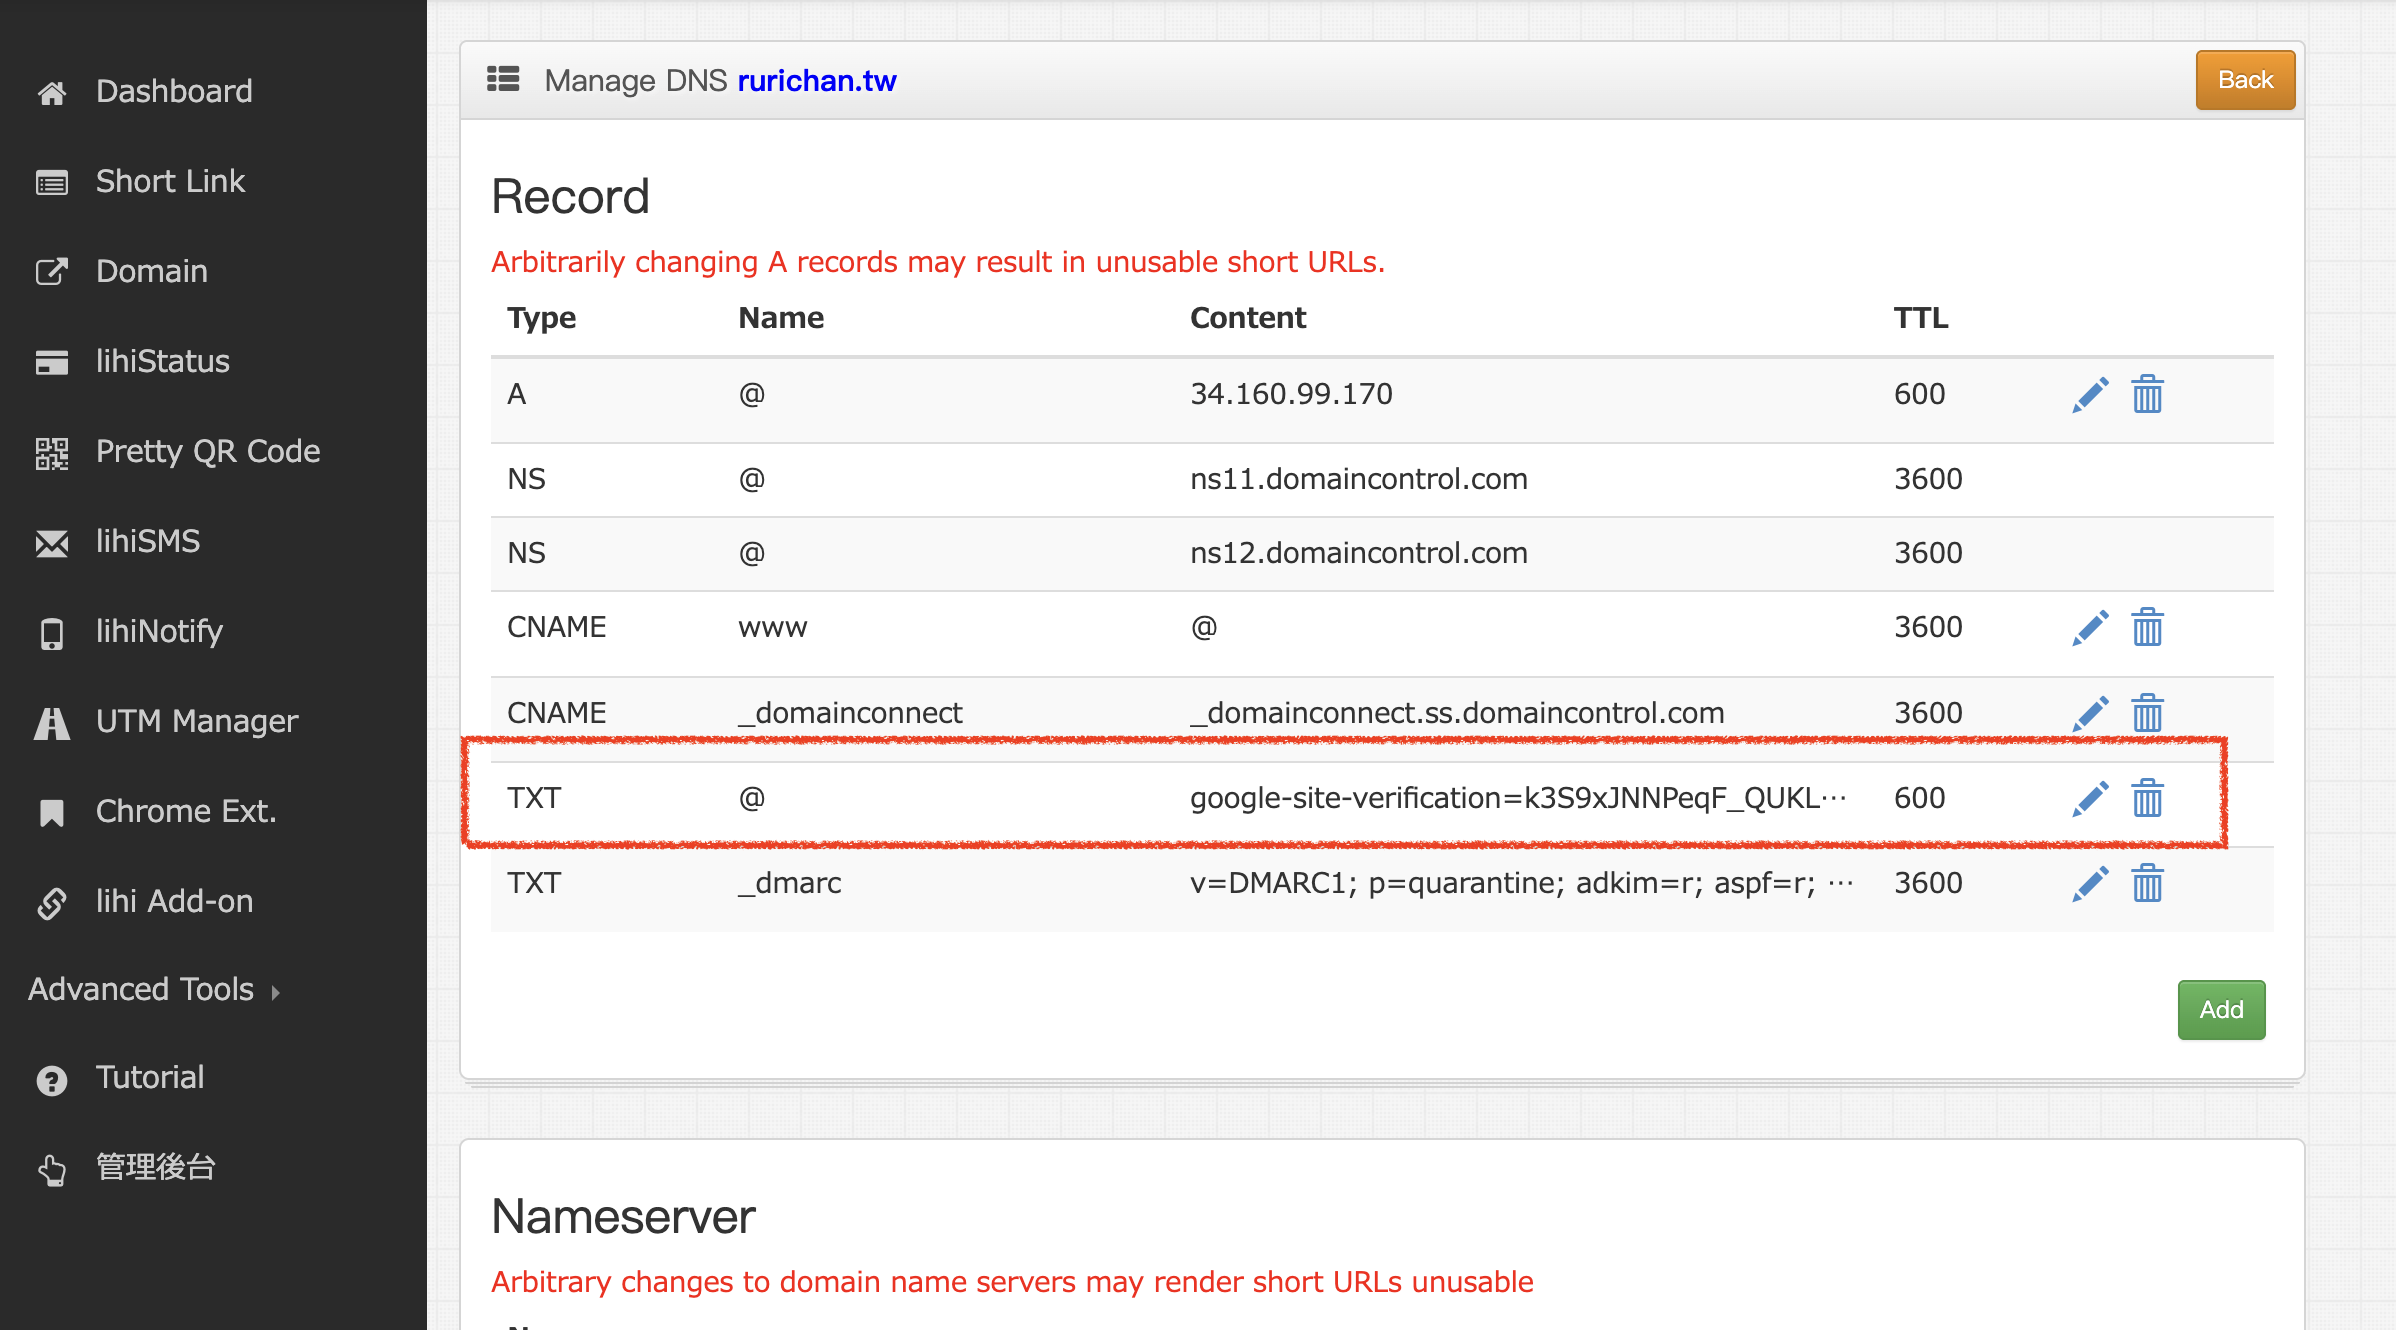
- Return to Google Search Console and click Verify.
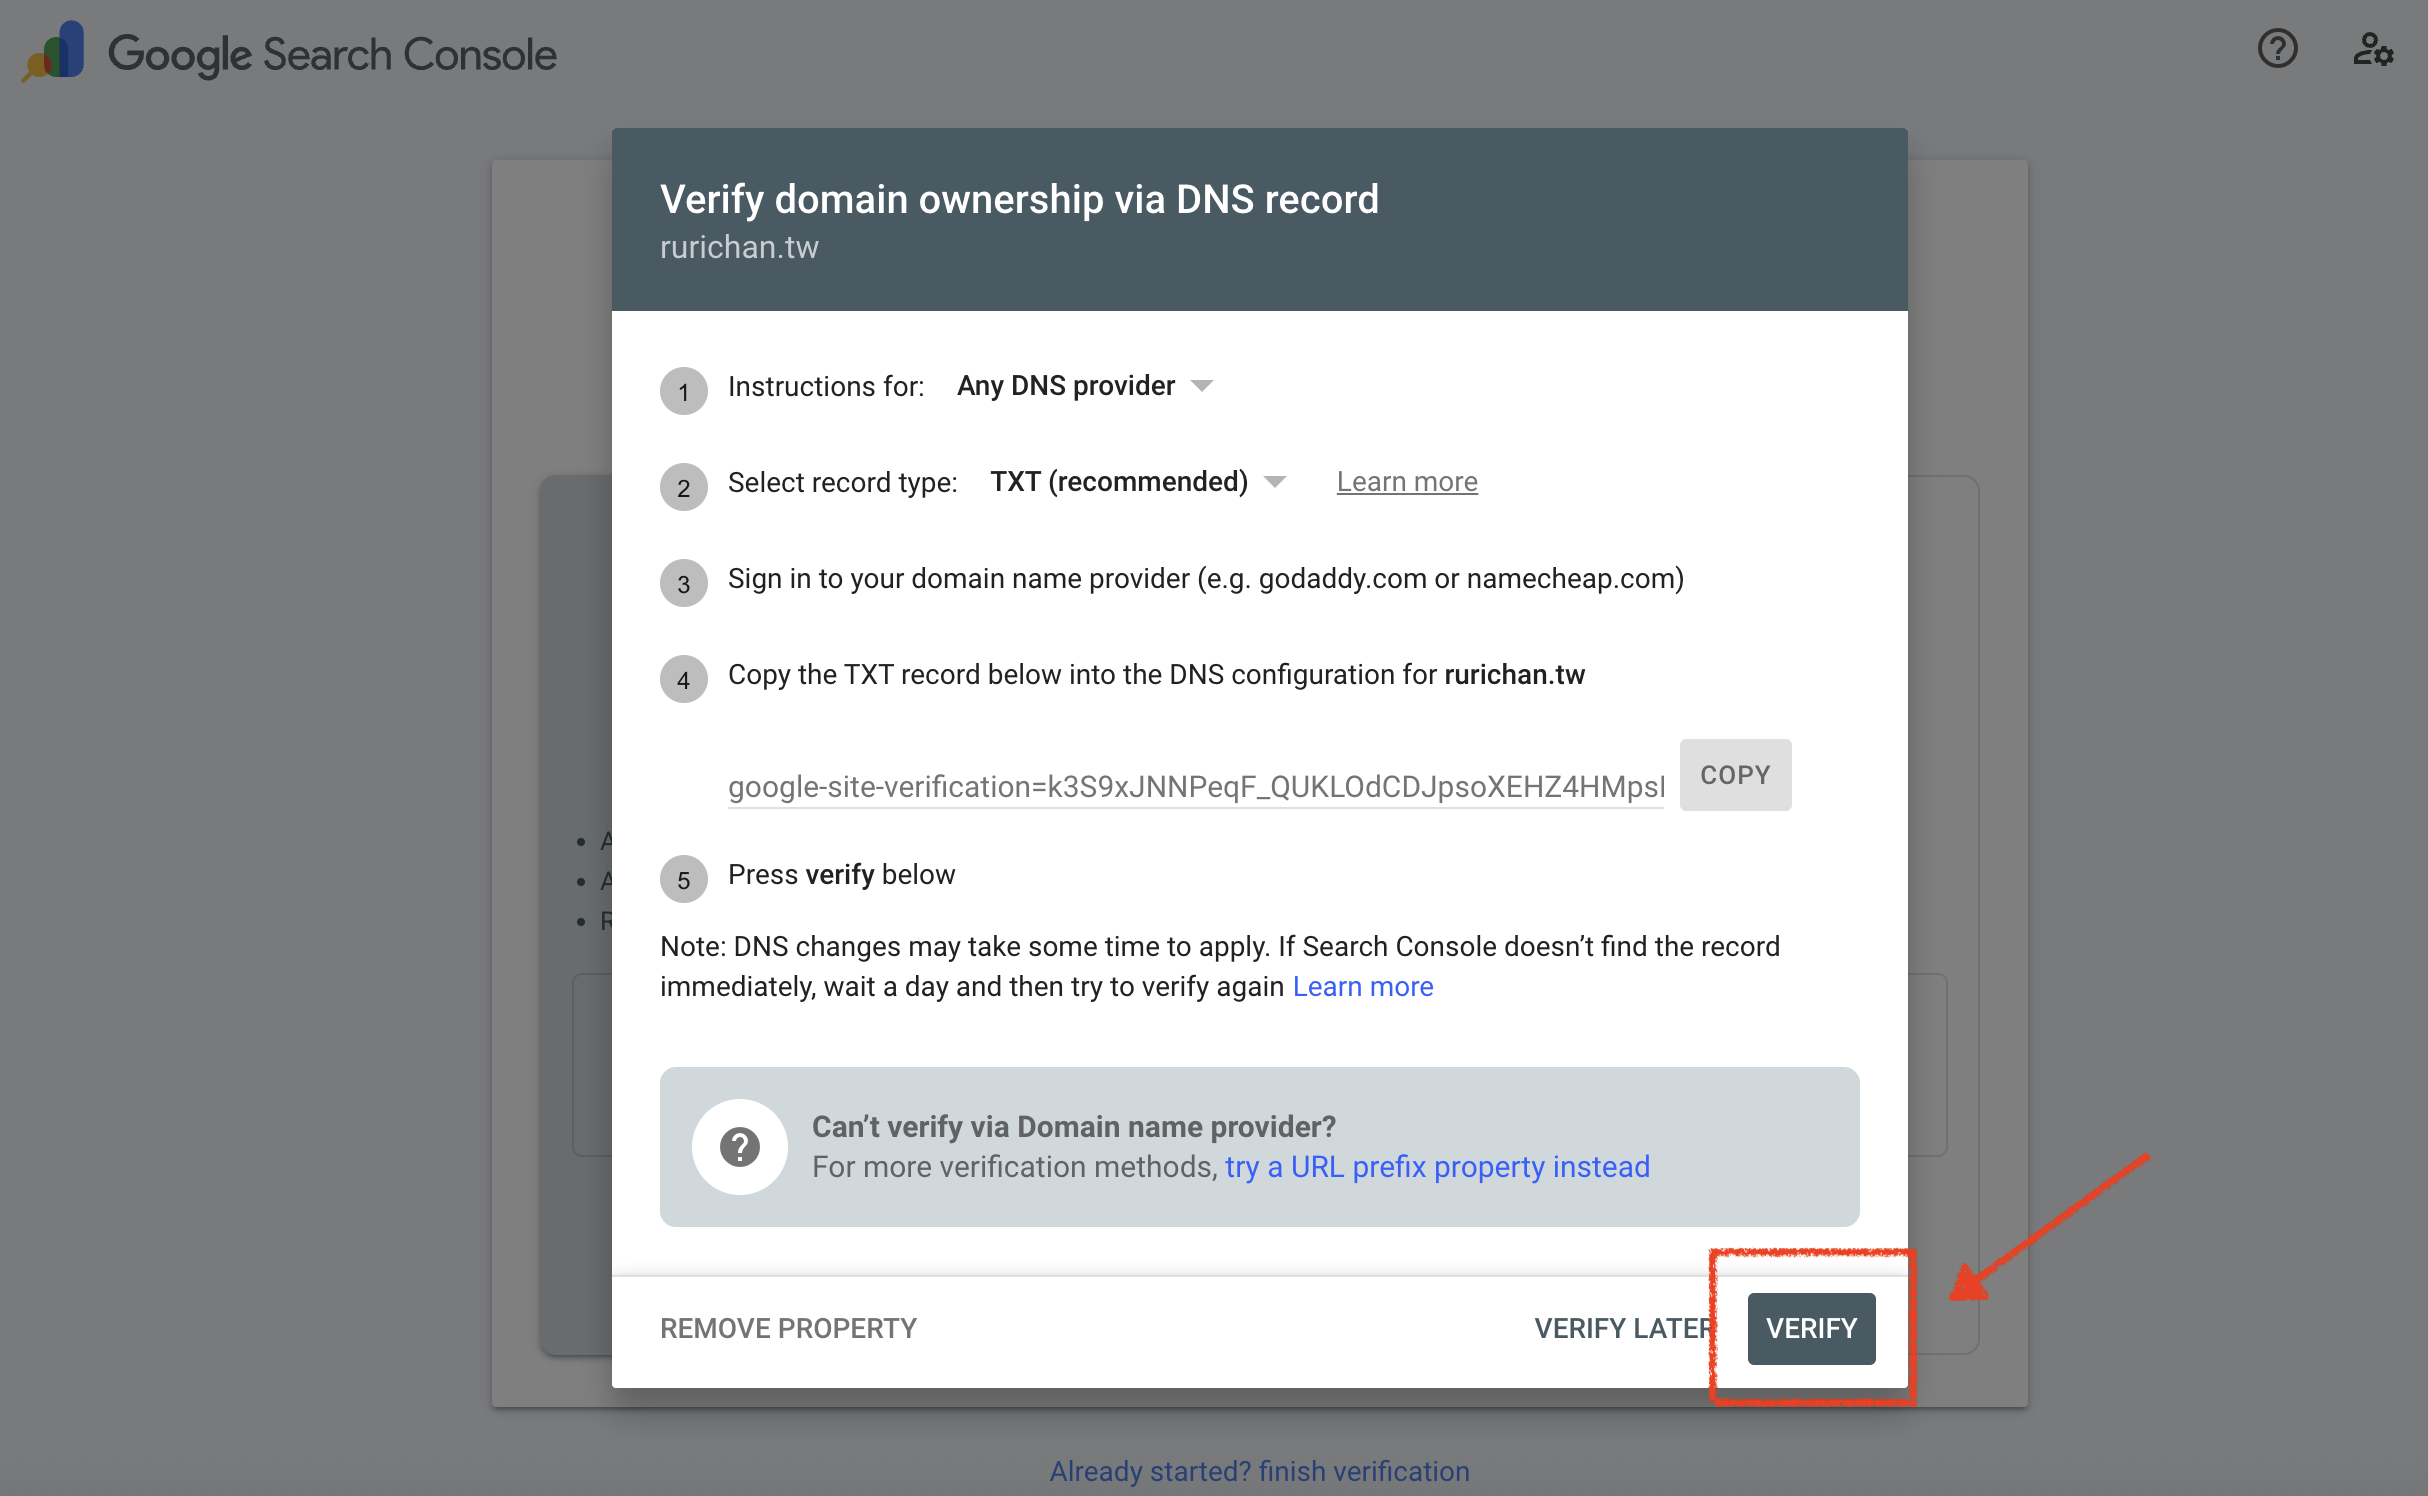
- Ensure the new record appears in your list.
- Completion: An “Verify domain ownership via DNS record” success pop-up window will appear. Click Verify to finish.
Start using lihi for free ⇒ Click Here!