What are the Benefits of Custom Domains? How to Set Them Up?
Using a custom domain (e.g., yourbrand.com) instead of a generic shared domain offers several strategic advantages:
- Customizable URL Slugs: You have full control over the text following the domain name.
- Example:
https://tips.lihi.io/KnowledgeBase - (This creates a memorable and descriptive link for your audience.)
- Example:
- Enhanced Brand Identity & CTR: A dedicated branded domain increases professionalism and trust, which significantly boosts the Click-Through Rate (CTR) among customers and fans.
- Security & Stability: Generic shared domains carry the risk of being blacklisted if other users misuse them for illegal activities. A custom domain ensures the security, reputation, and permanent availability of your links.
How to Purchase and Set Up a Custom Domain
Please follow the steps below to subscribe and configure your domain.
First: Subscription Setup
(If you are already a subscribed user, please skip to Step 4.)
1. Check Subscription Status: This feature is available for paid plans. If you are not yet subscribed, please select a plan first.
2. Select Billing Cycle: Choose your preferred payment cycle and scroll down.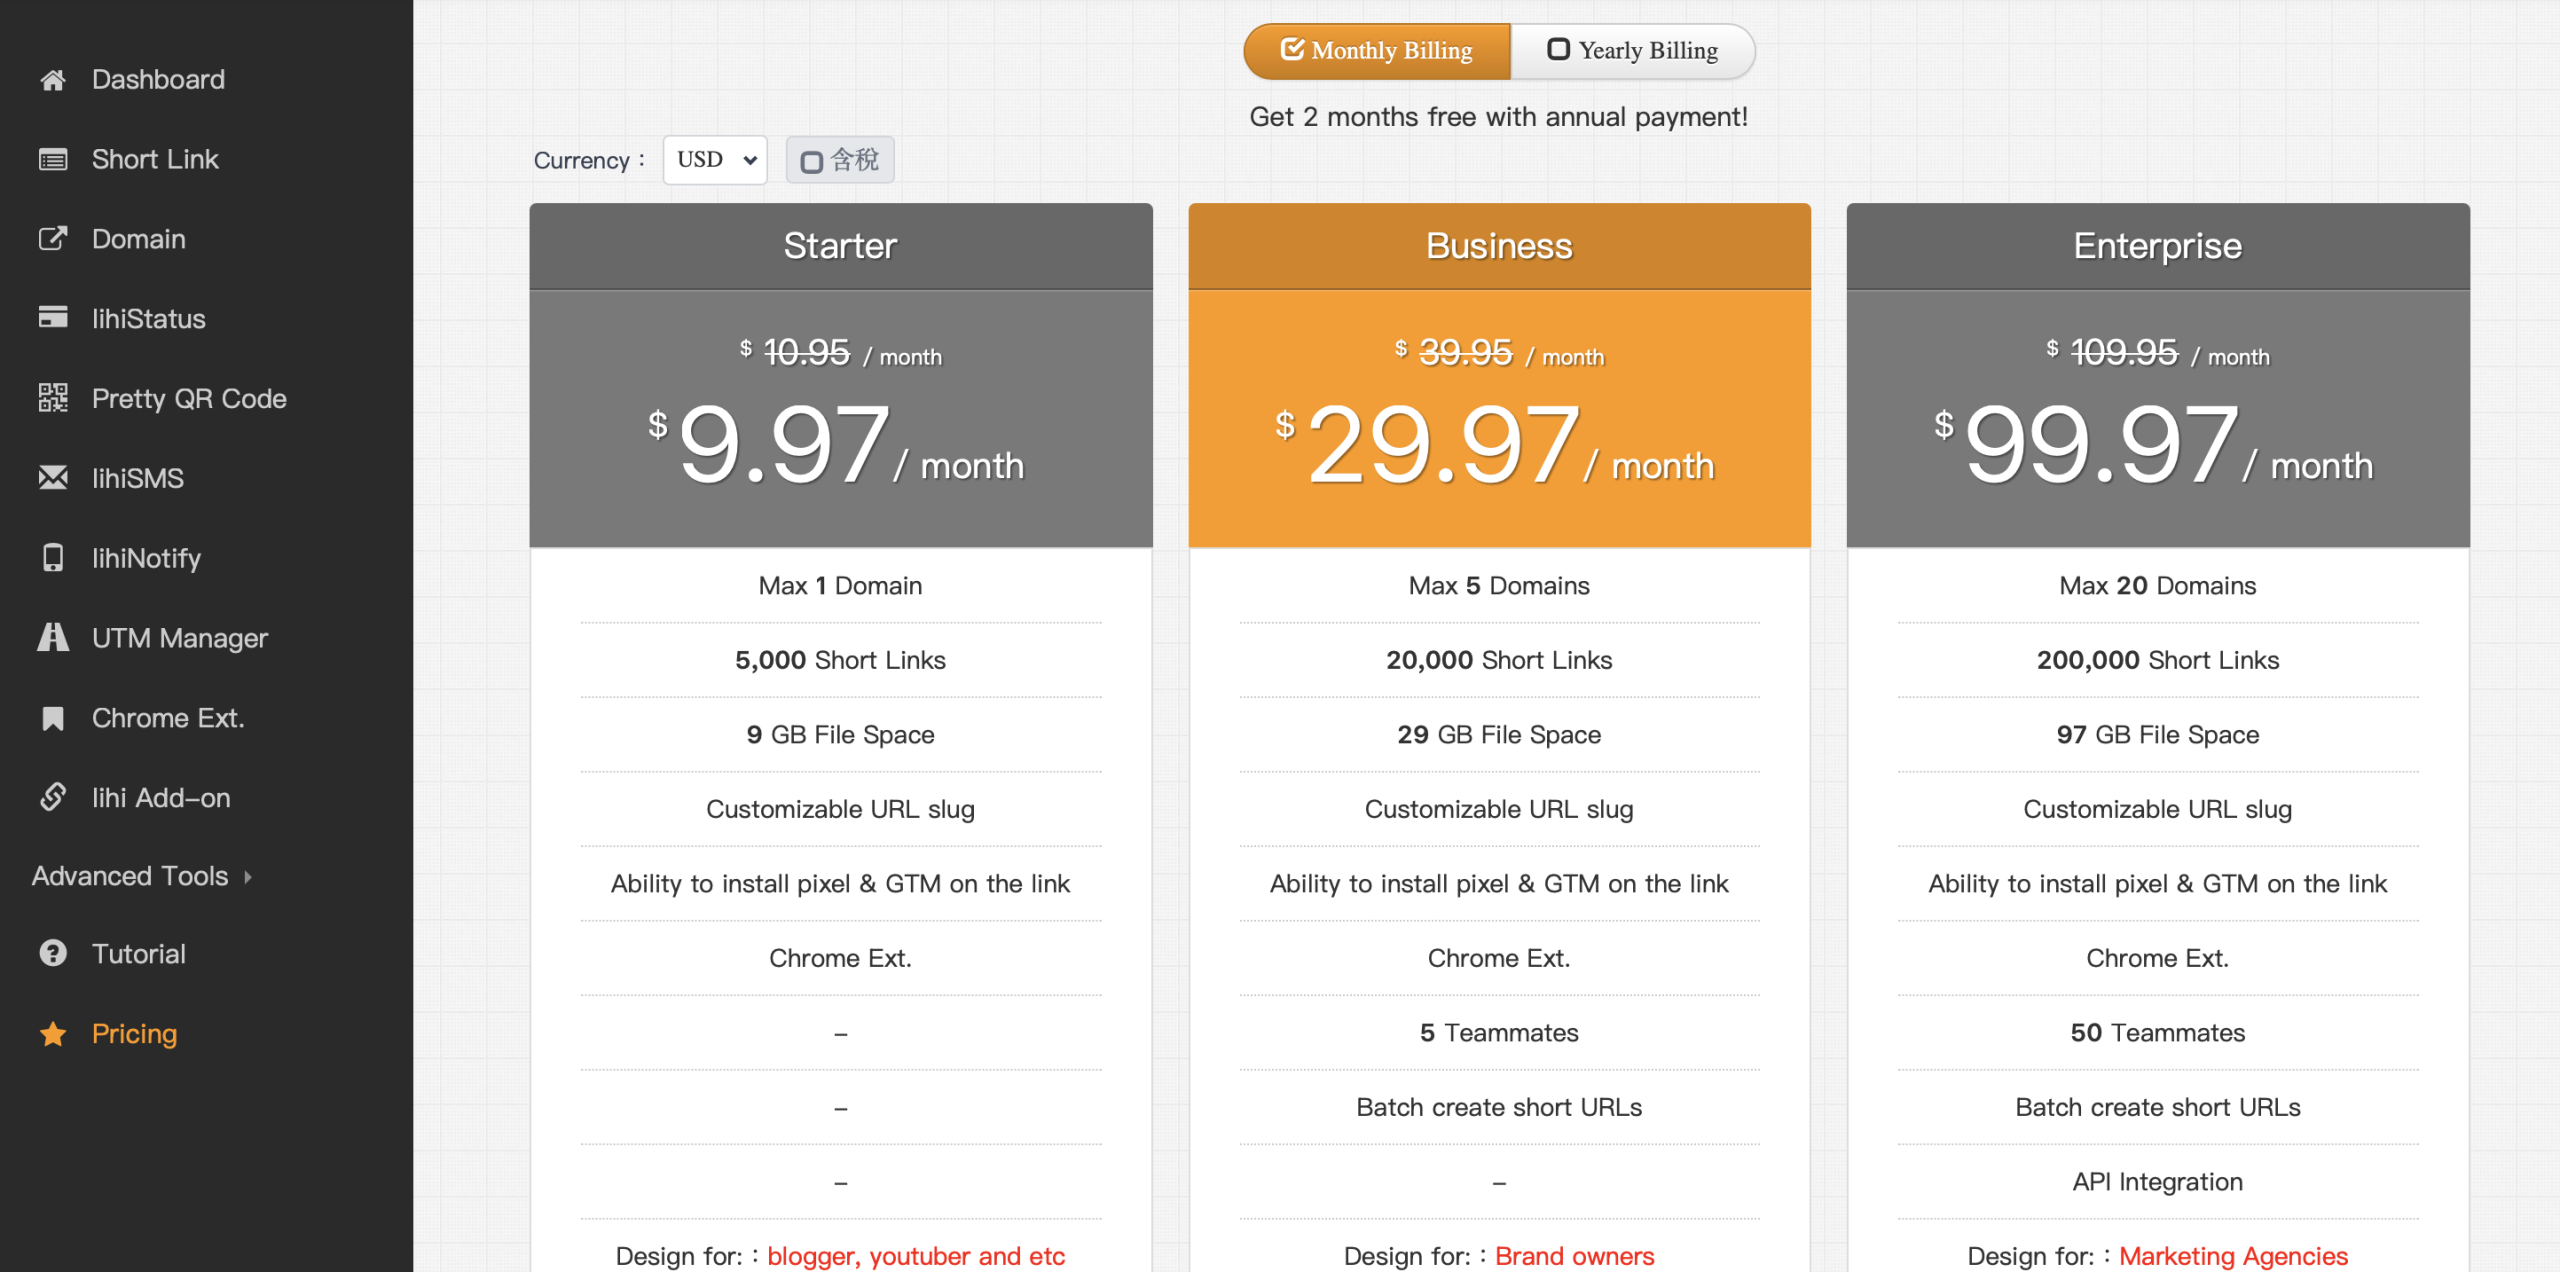
3. Complete Payment:
-
- Enter your payment details and click to proceed to 3D Secure verification.
- Enter the verification code on the banking screen and submit.
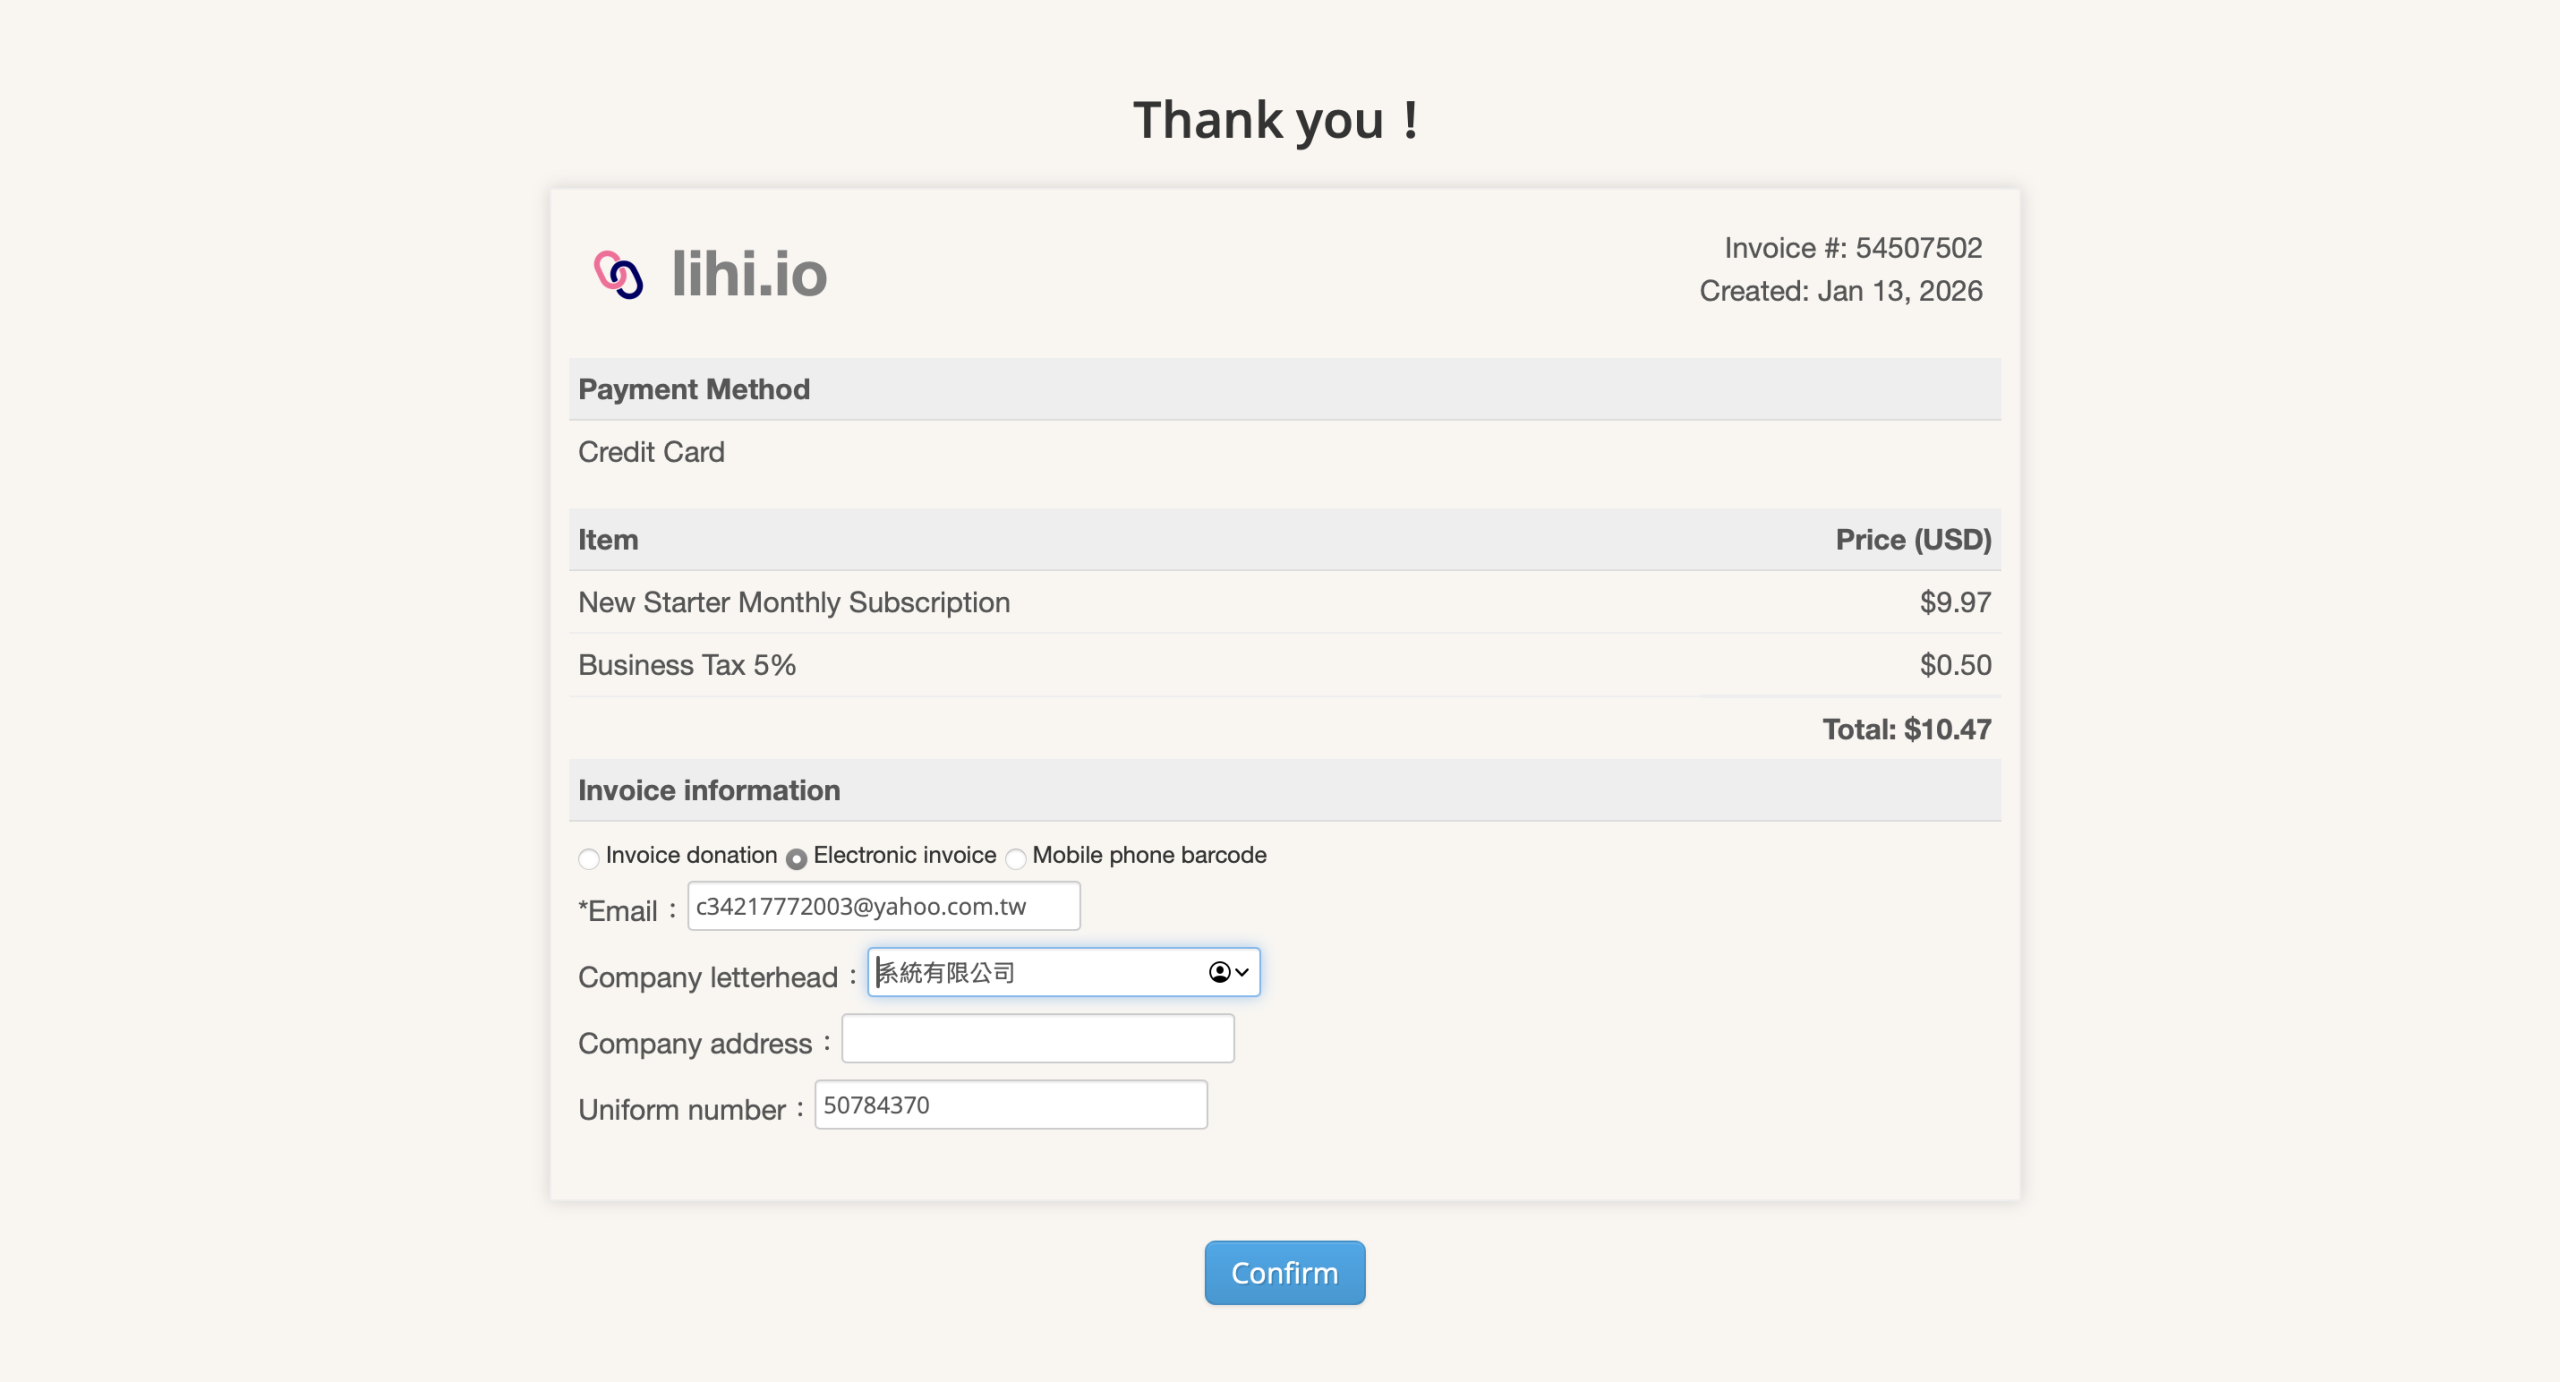
- Once redirected to the “Thank You” page, you may enter your invoice details (Tax ID) if needed.

Domain Purchase & Activation
4. Search for a Domain:
-
- Go to the left sidebar menu and click Domain.
- Click Buy domain.
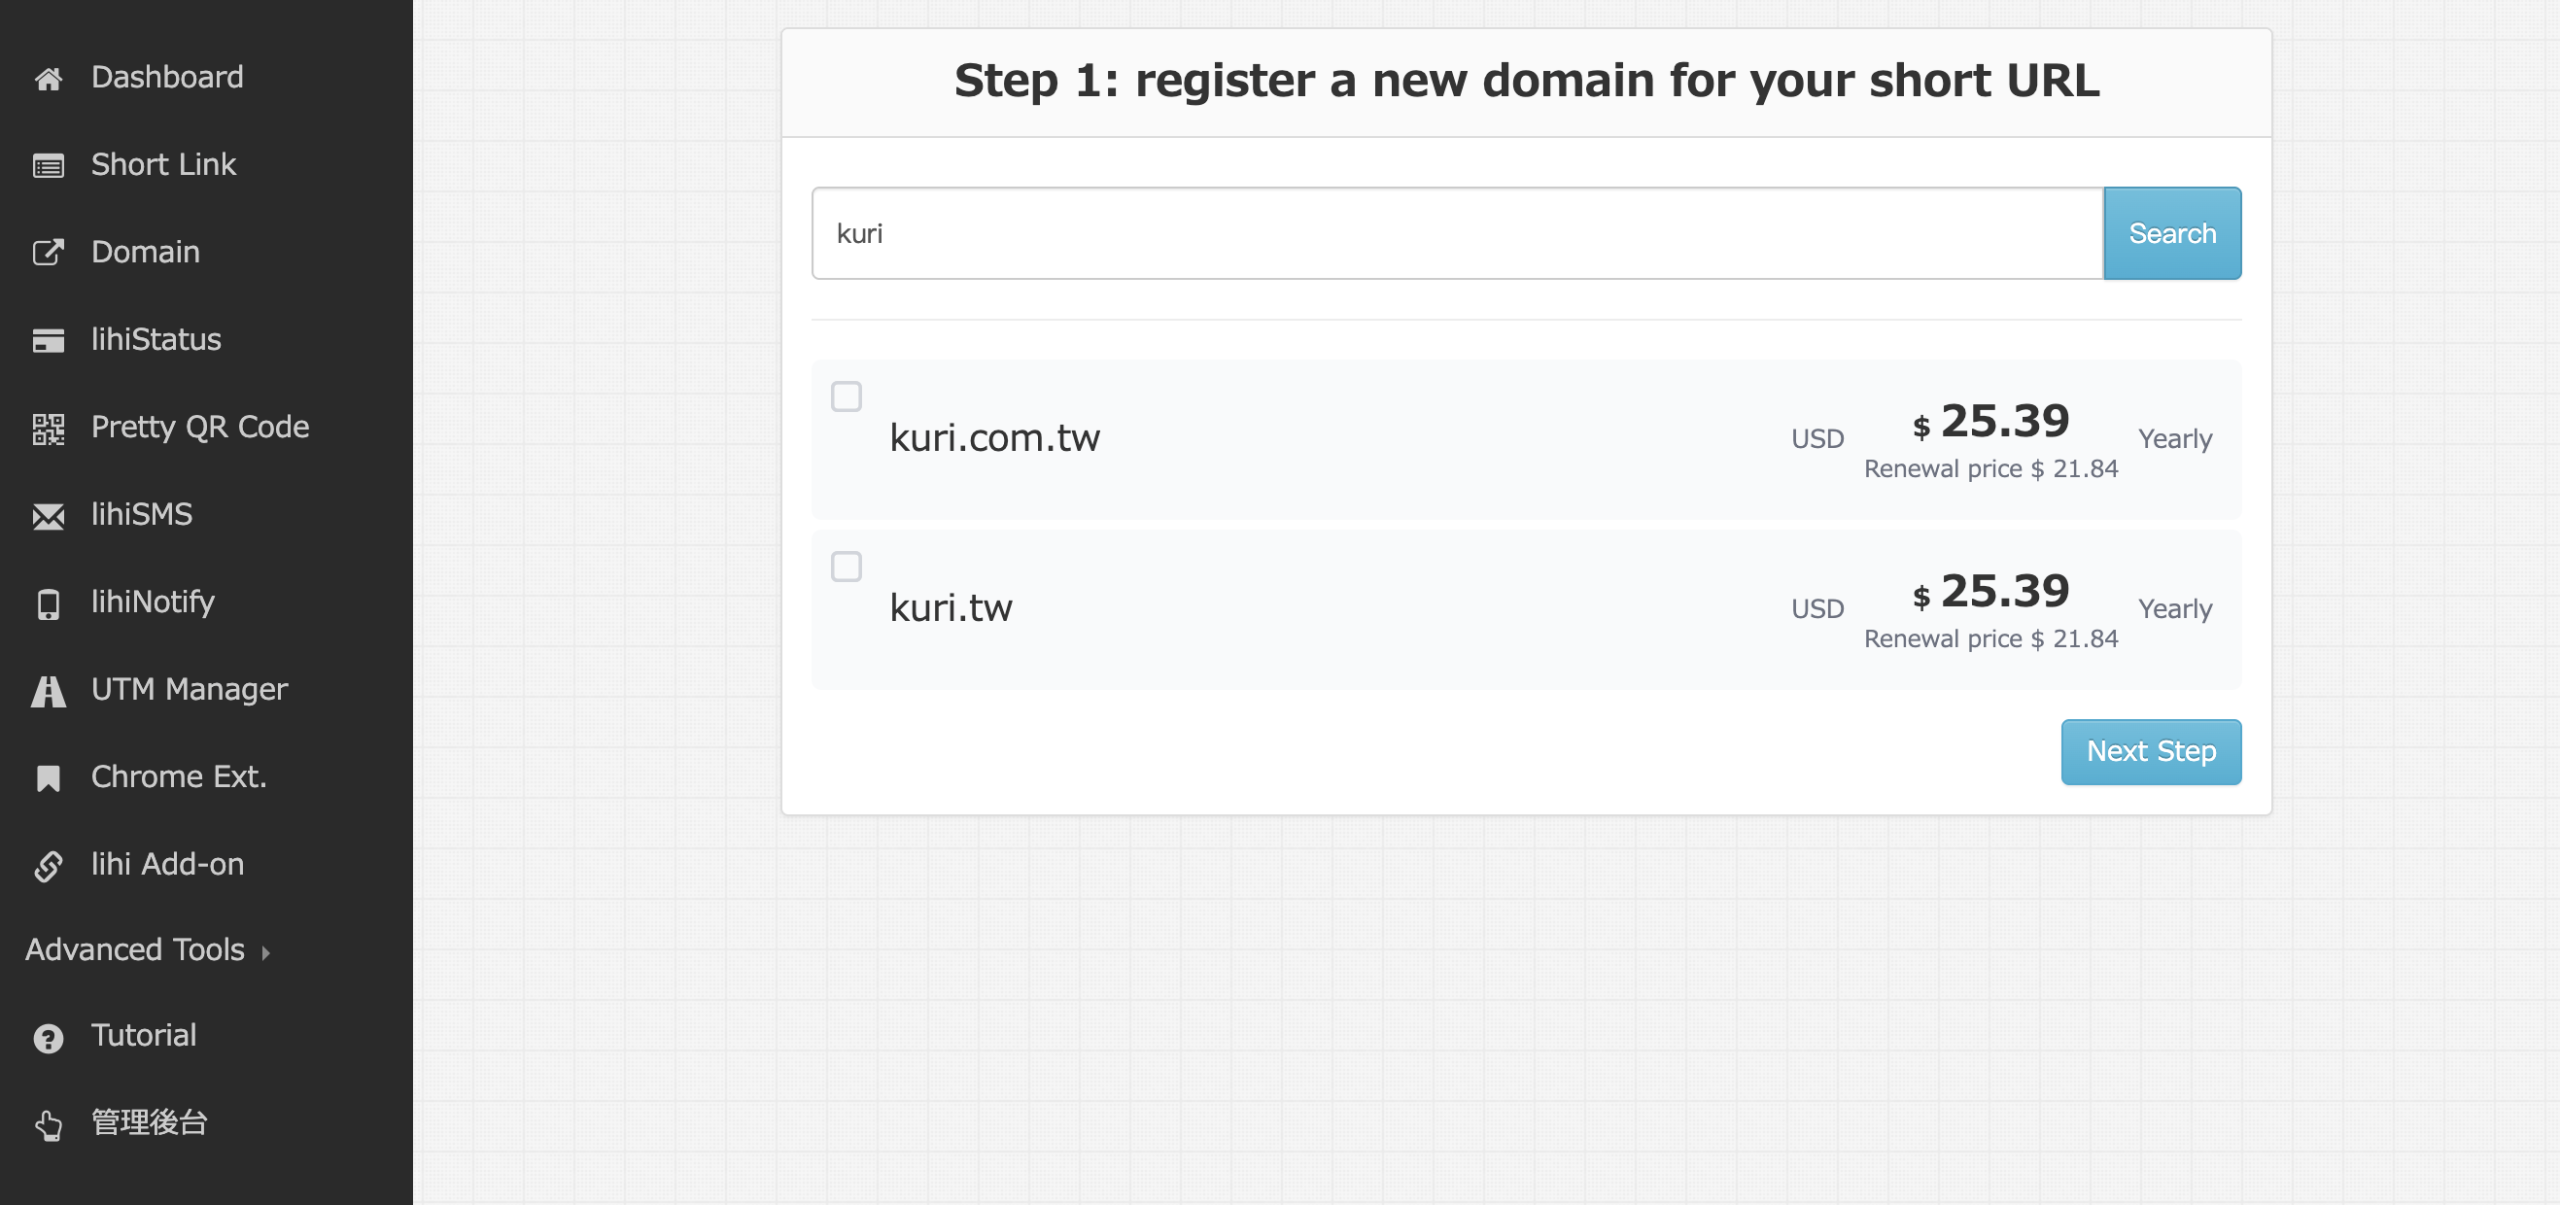
- Enter your desired domain in the search bar and click Search to check availability.
Note: If the domain is unavailable, the system will suggest similar alternatives.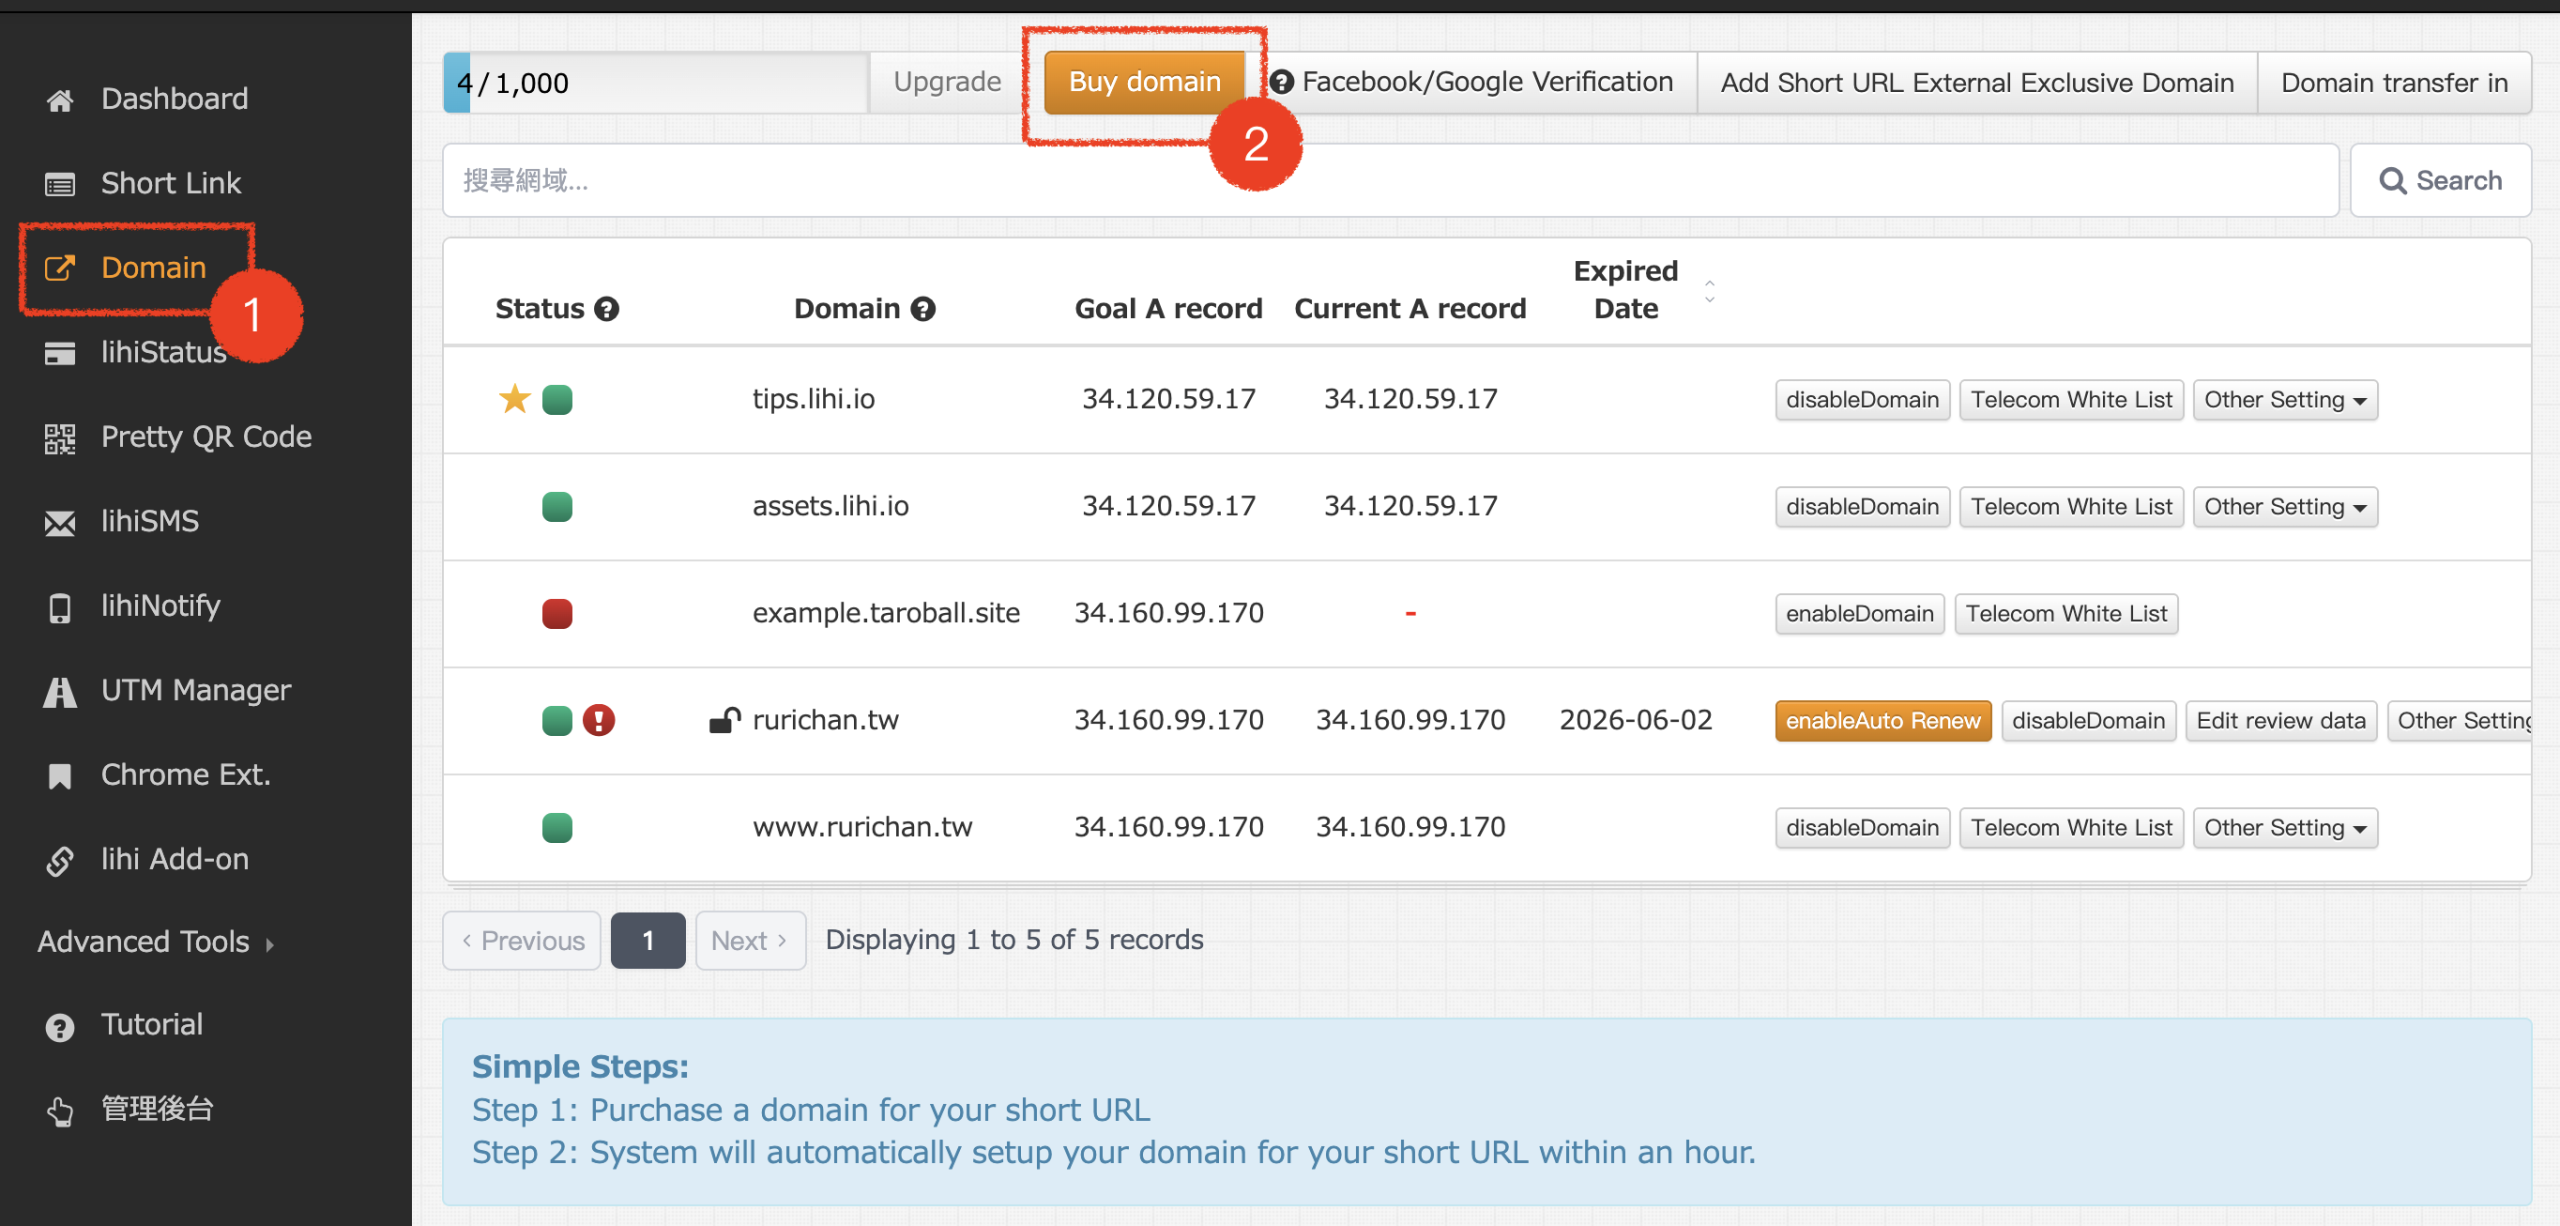
5.Select a Domain:
-
-
- Choose the domain you wish to purchase and click Next Step.
- (Note: If you already own a domain from another registrar, please select “Add short URL External Exclusive Domain” and skip to Step 6.)
-
5. Review Purchase Details: Confirm the domain name and select the registration period (default is 1 year, up to 5 years.) Scroll down to proceed.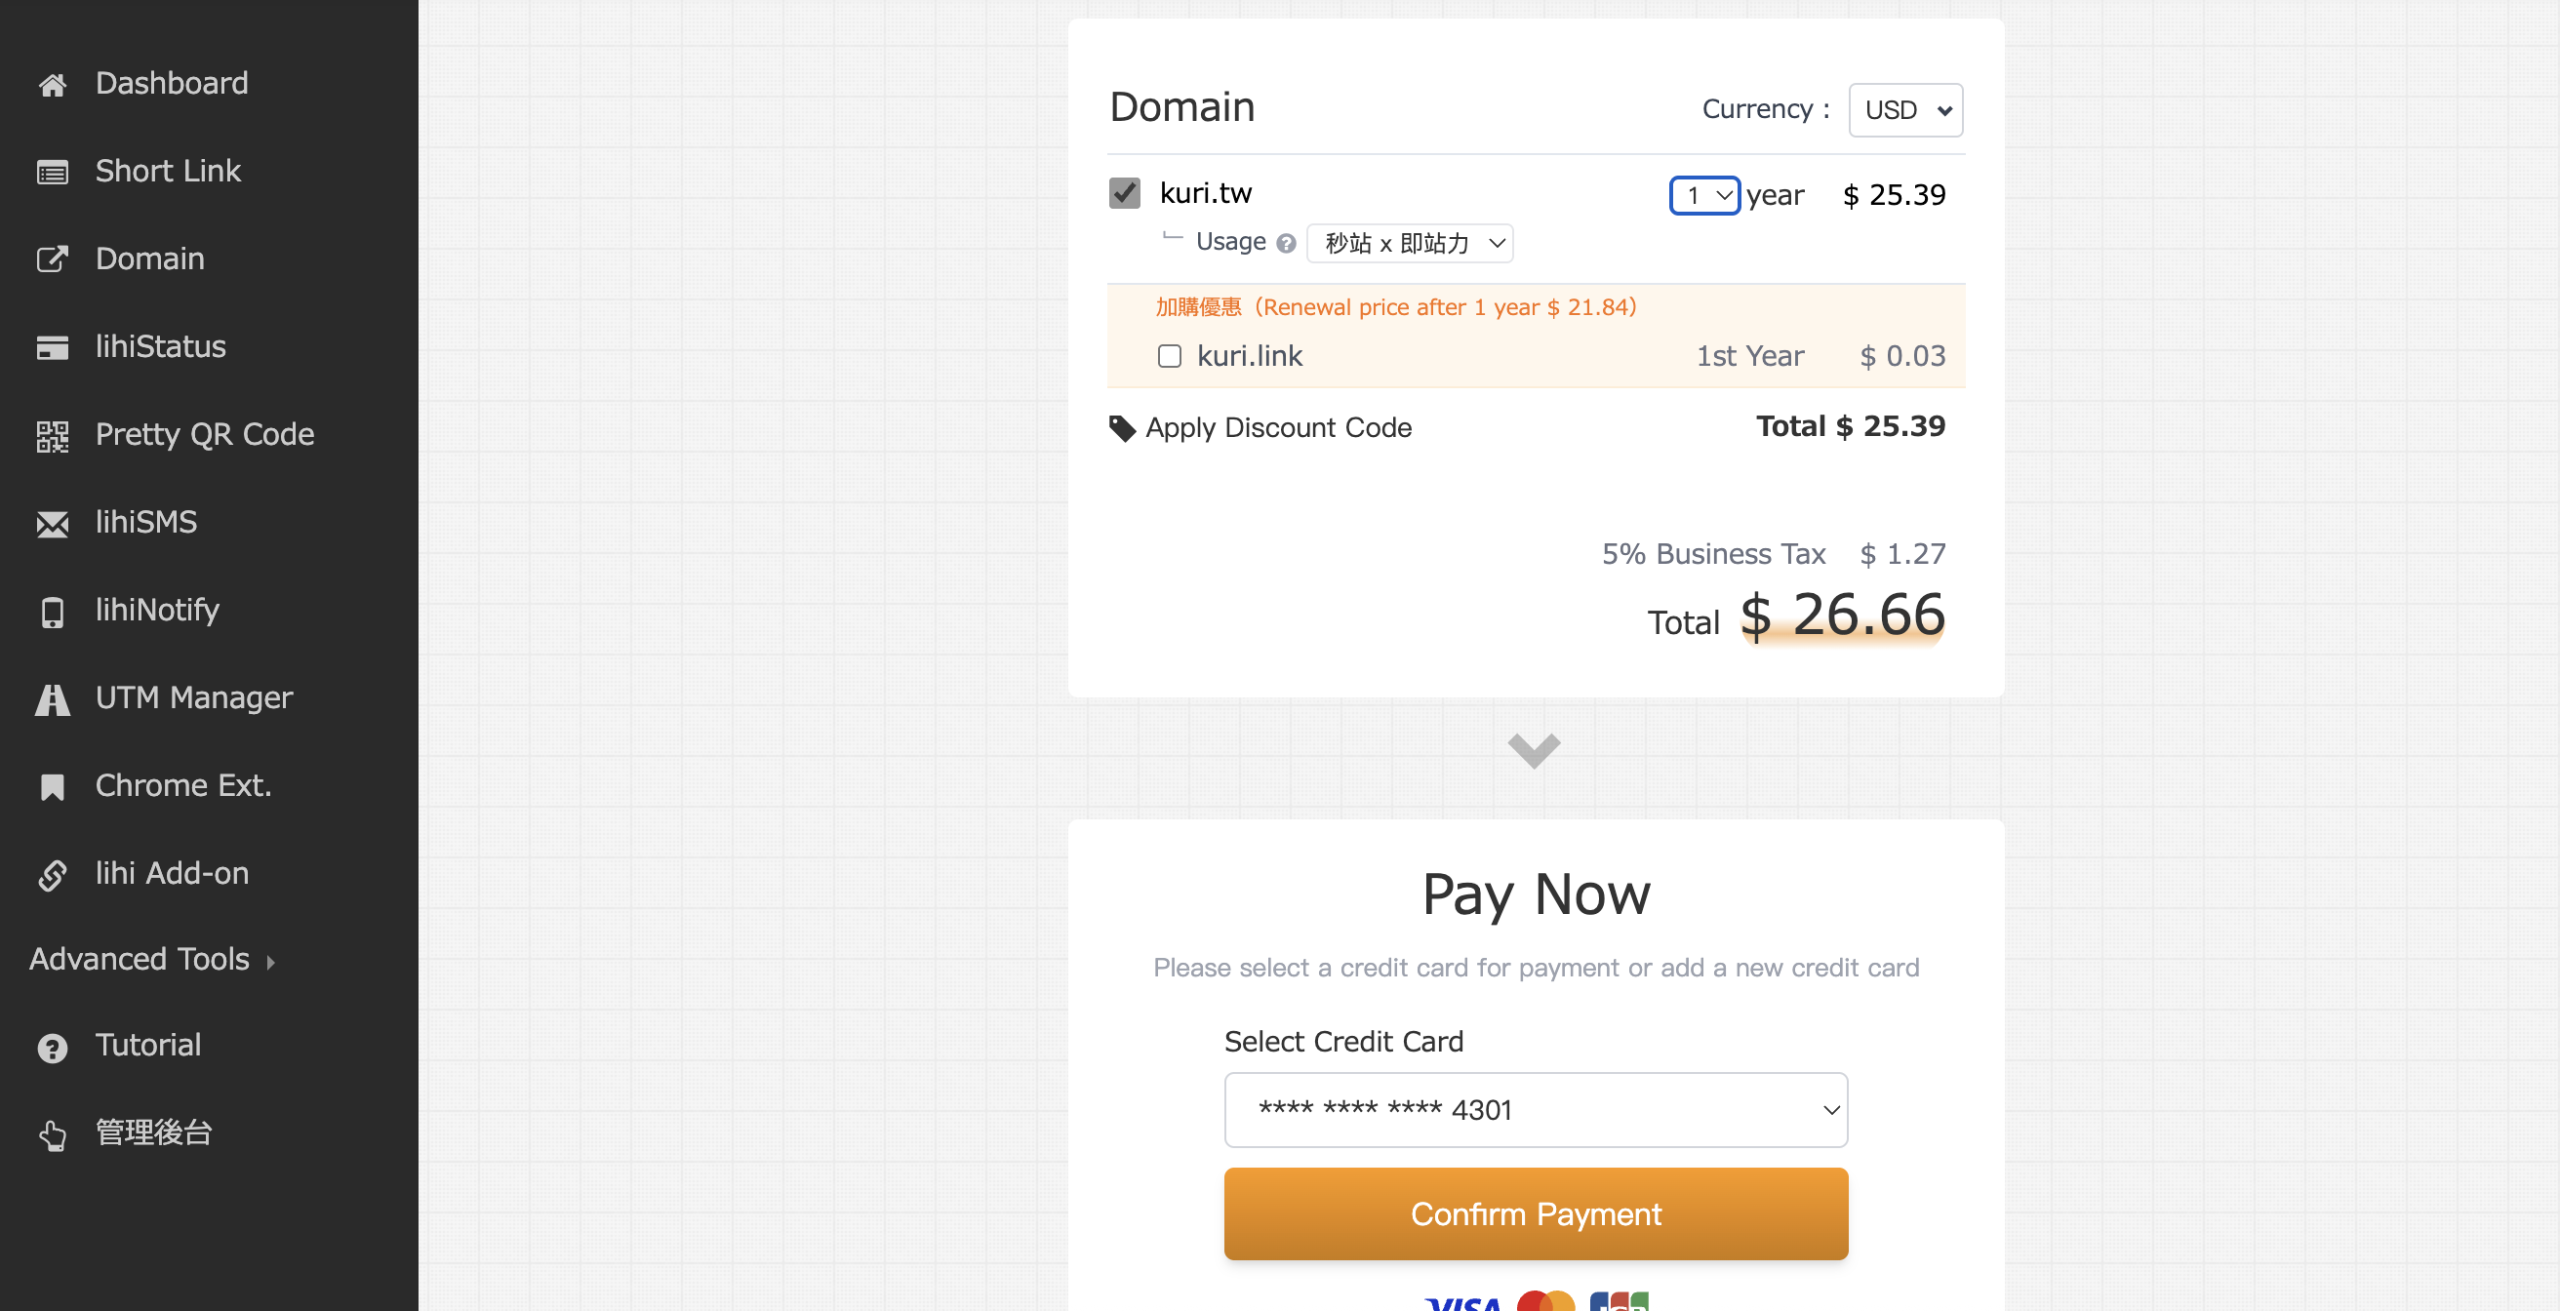
7. Payment Verification: Enter payment details, completing the 3D Secure verification process, and click Confirm Payment.
8. Purchase Complete: You will be redirected to the confirmation page. You may fill in your Tax ID/Company Title for invoicing if required.
9. Activate Domain:
-
- Click Confirm to return to the main dashboard.
- Navigate to Domain on the left menu and click enable Domain on your new domain.

📝 Note for External Domains: If you are using a domain purchased elsewhere, you must configure the DNS settings at your domain registrar. Point the A Record to the designated IP address provided by lihi. Once configured, return to lihi, click “Add short URL External Exclusive Domain,” and enable it.
Start using lihi for free ⇒ Click Here!